HOW TO ROAST RED PEPPERS (OR ANY PEPPER REALLY!)
Roasted Red Peppers – Learn how to roast bell peppers, whole or sliced, on the oven, in the oven, or on the grill – plus how to steam, peel and store your freshly roasted peppers.
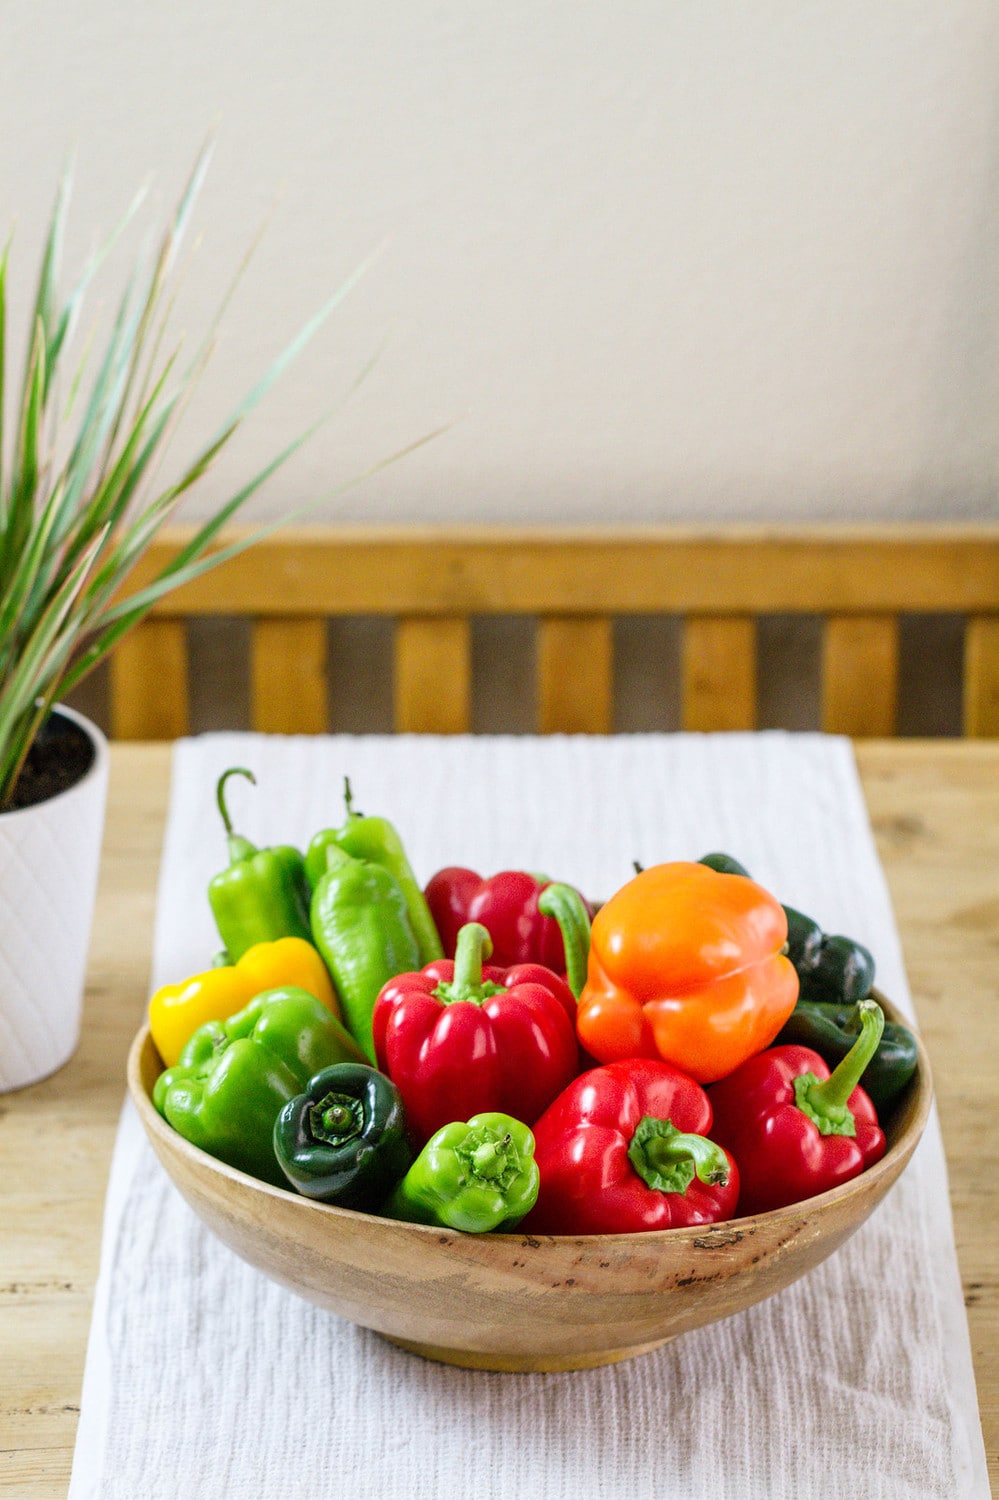
Roasting peppers enhances their sweetness, and adds a wonderful smoky char depth and silky texture. This is your guide to the different methods of roasting peppers. Whether making a few or a large batch, this guide will make your roasting experience a good one!
I’ve used bell peppers, but you can easily adapt these methods for all kinds of peppers. The only adjustment you may need to make is watching the time, smaller peppers like jalapenos and mini-sweet peppers will cook faster.
Over the last week, I’ve had the opportunity to try a few ways of prepping and roasting red peppers. In the end, all the peppers were equally delicious, but the methods of prepping vary greatly. I hope this guide will help you decide which way is best for you.
(Note – The full printable recipe and instructions are at the bottom of this post)
How To Roast Whole Peppers – Oven Method
For my first try, I roasted them whole in the oven, which is how I’ve always done it. I like this method of roasting and think it’s great if you plan on making a whole bunch of roasted peppers and saving some for later.
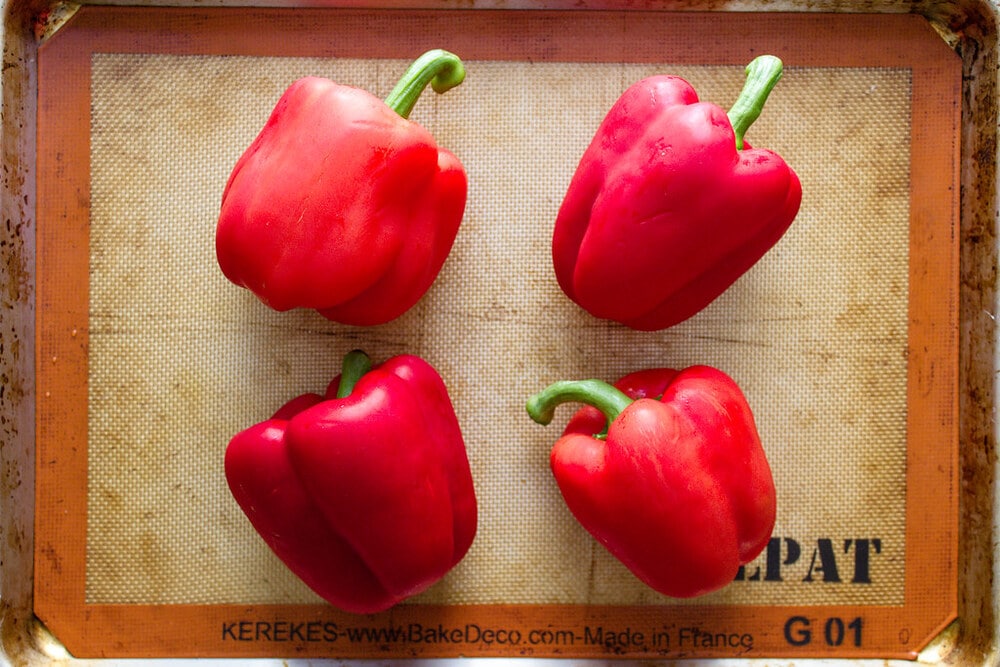
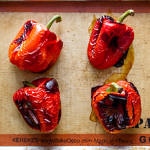
First, wash and dry the peppers, and place them on a rimmed baking sheet lined with silpat or parchment paper, as shown above. Lining the baking sheet will make clean-up a lot easier!
Next, place in the center of the oven and roast for about 40 minutes or until soft, puffy, and charred.
When done, your peppers will be puffy from the air inside, but once removed and cooled a bit they will deflate and become wrinkly, as shown below.
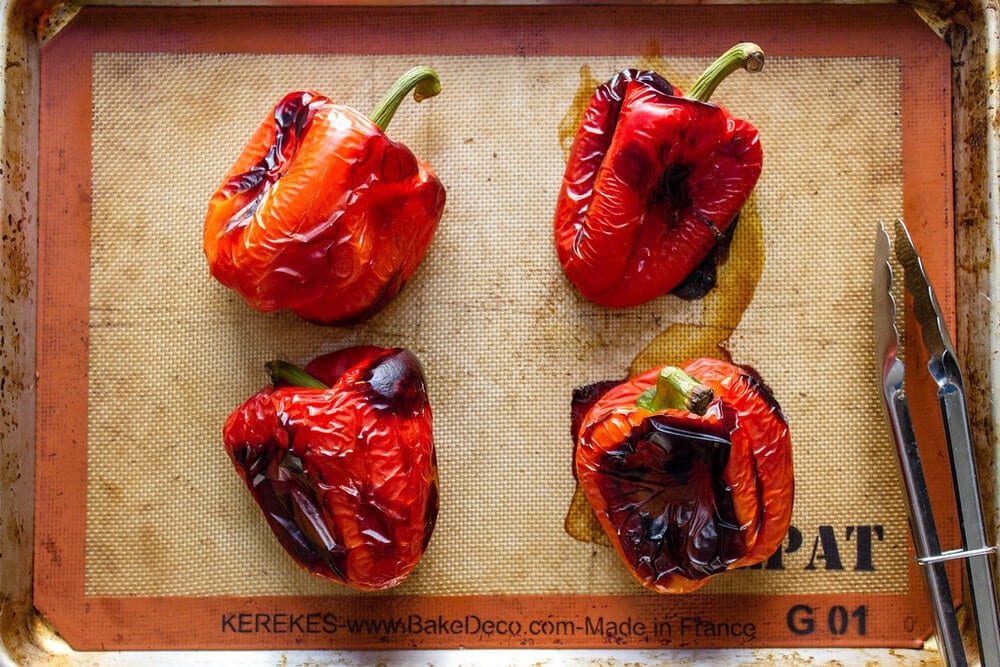
THE PROS: You can get 8 whole peppers on a standard-size baking sheet (maybe more depending on the shape and size), and when steaming you’ll get a lot more pepper juice at the bottom of the bowl to use for storing in mason jars.
THE CONS: You’ll still need to remove the seeds. It’s not a terrible thing, but it makes this method my second favorite way to roast peppers.
How To Roast Sliced Red Peppers – Oven Method
The next method I tried was to slice the peppers in half, remove the seeds and stem, and place the cut-side down on the baking sheet. This is my first try with this method and I’m in love with it. Where have I been? It is so easy with much less mess!
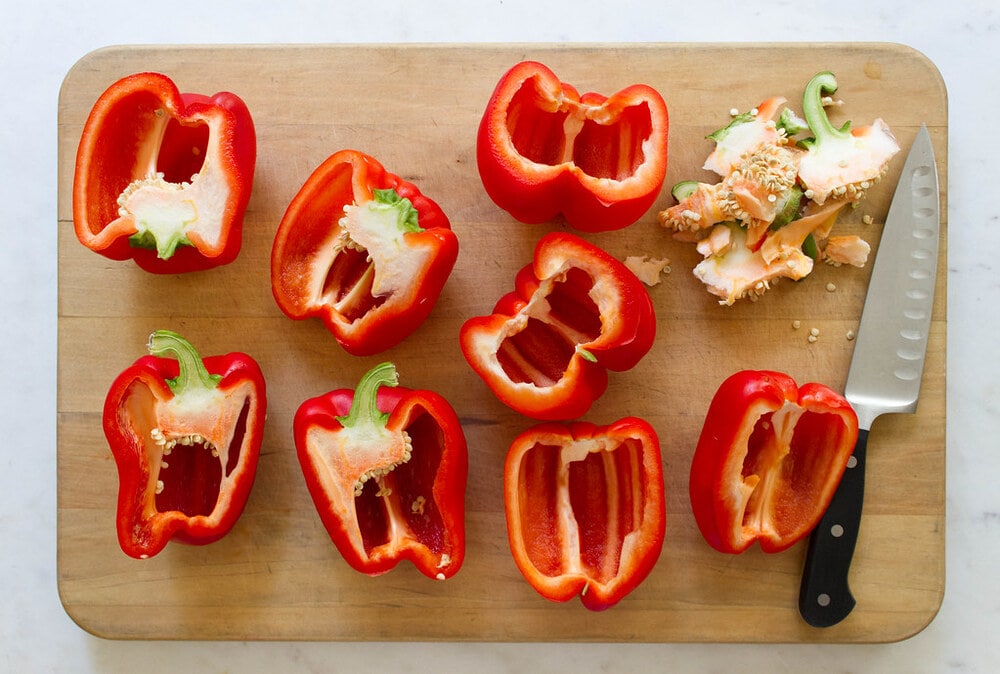
Start with washing and drying the peppers. Slice them in half lengthwise, and remove the core and seeds, shown above.
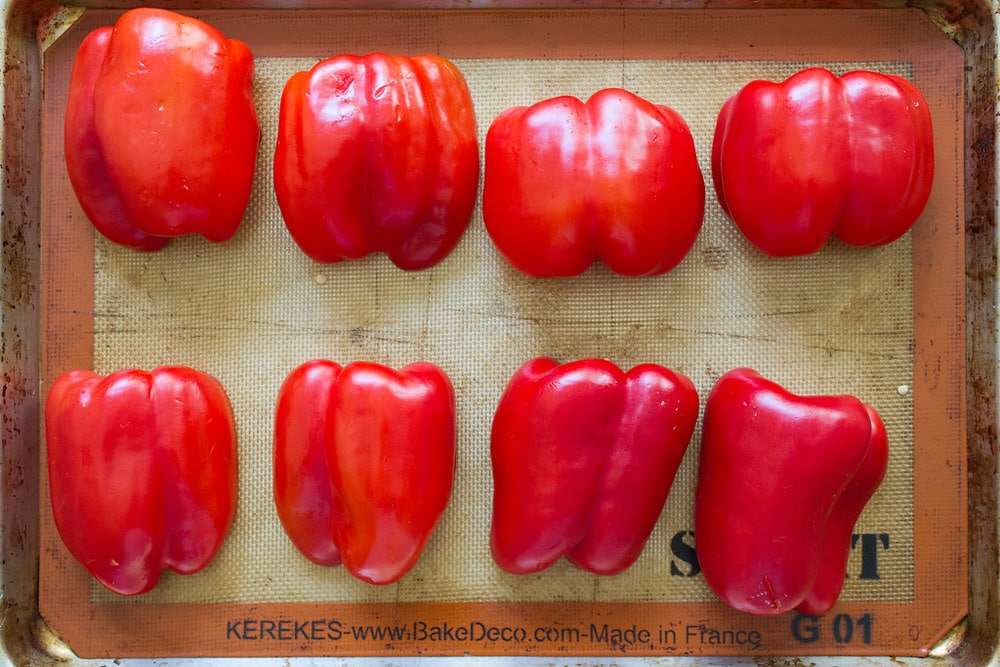
Next, place the peppers, cut side down, on a lined-rimmed baking sheet lined with parchment paper or silpat, as shown above.
Place in preheated oven set at 475 degrees for 40 minutes, until soft and nicely charred, as shown below.
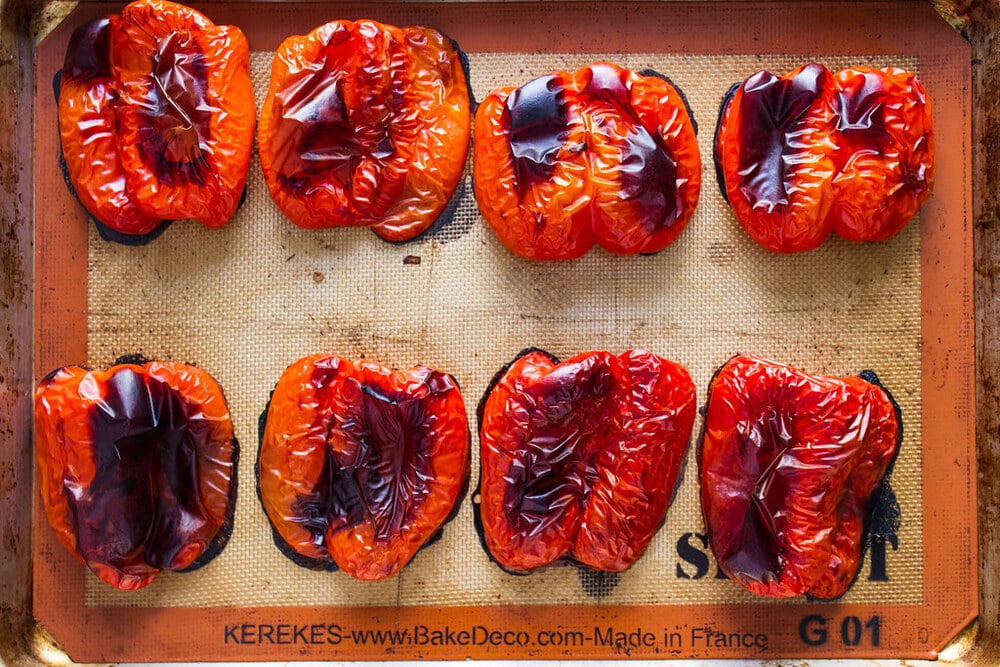
THE PROS: You can do at least 4 peppers, maybe more depending on the shape, no need to flip while roasting, and you only have to remove the skins making the next step so much easier. This is an efficient method and great for most home cooks. It is my new favorite way to roast peppers when not storing them for a long time.
THE CONS: You will not get much pepper juice for storing and you can’t fit as many peppers at one time.
How To Roast Peppers On The Stove
The method of charring peppers on a gas stovetop is simple, but you do need to keep an eye on them.
STOVE TOP: If roasting just 1 or 2 peppers, you can roast it over the gas burner of your stove (I suppose you could do 4 peppers utilizing each burner). Place pepper on its side and adjust the flame so it just ‘licks’ the peppers. Keep an eye on it and turn it as needed to blacken and char, about 15 – 20. This tends to be a more time consuming method since you have to be so watchful.
PROS: One less dish to wash.
CONS: You have to be very watchful and juices may drip all over.
The oven method is more to my liking, but I’ve added instructions for these methods in the recipe card as well because I want this to be a fairly complete guide to roasting peppers. I encourage you to try whatever sounds best for you and your situation.
How To Roast Peppers On The Grill
Using a gas grill to roast your peppers is simple and easy. Since I don’t have an outdoor grill I couldn’t try this method, but here are instructions for the grill.
OPEN GRILL: Place whole peppers on their sides over an open flame on the grill, turning every now and then until nicely charred all over. Depending on how big your grill is will determine how many you can do at one time.
PROS: One less dish to wash.
CONS: Can’t think of any.
How To Steam Roasted Red Peppers
Once you’ve roasted or grilled your peppers, the next step is to cover and steam them while they are still hot for 30 minutes or so. This step is optional, but it really helps the skin peel away easily!
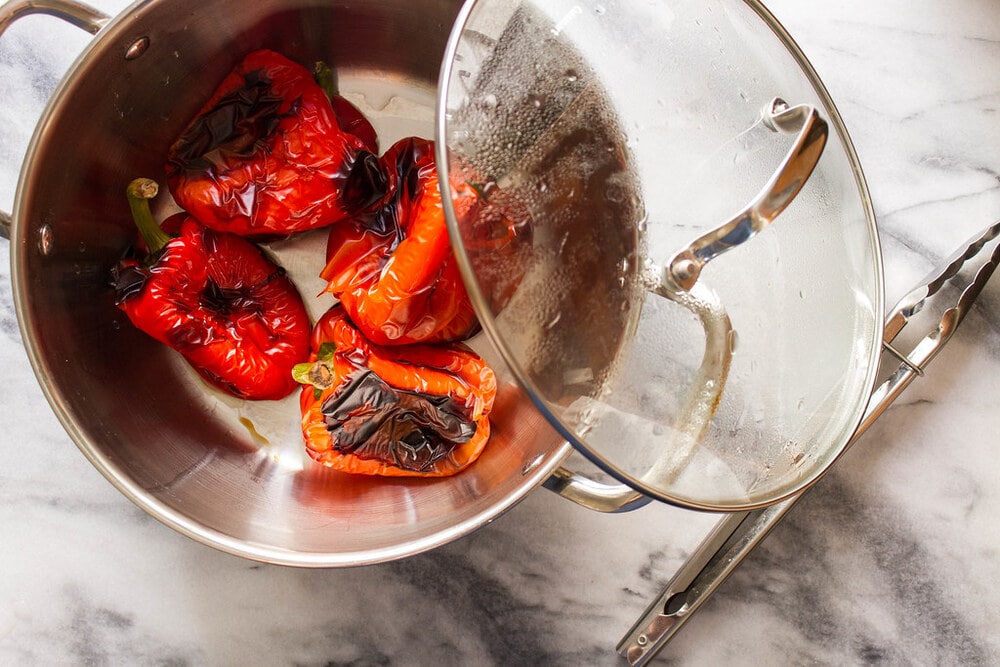
No matter how you roast them, this step will greatly help with skin removal. You can do this process a few different ways, fitting into whatever works best.
- In the scenario above, I placed my freshly whole roasted peppers in a pot to steam with the lid on. Since I was going to cook pasta for the same recipe, using roasted peppers made sense. I could simply rinse the pot and use it without creating more dirty dishes.
- As shown below, you can also place the warm roasted peppers in a bowl and cover it with a plate or use a small container with a lid, to seal in the moisture.
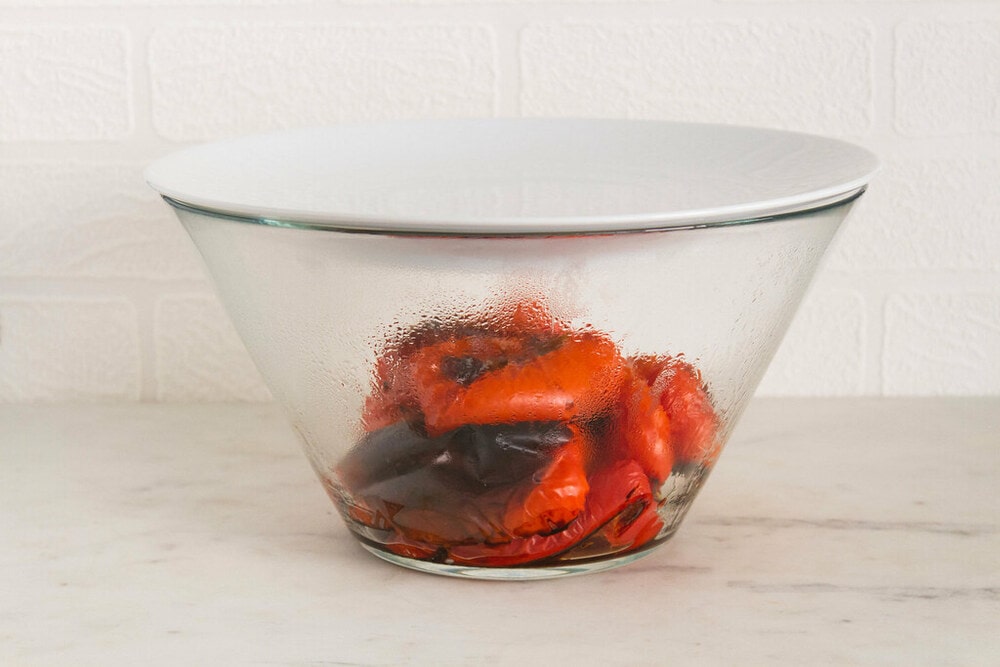
You get the idea. However you choose, let them steam for about 30 minutes. But if you’re really in a hurry, you can still peel your peppers without steaming, it just may take a little more effort. Just be sure to let your peppers cool down before peeling so you don’t burn yourself.
How To Peel Roasted Red Peppers
The last step is peeling your roasted peppers. Here I’ll share with you how I peeled whole and halved red peppers.
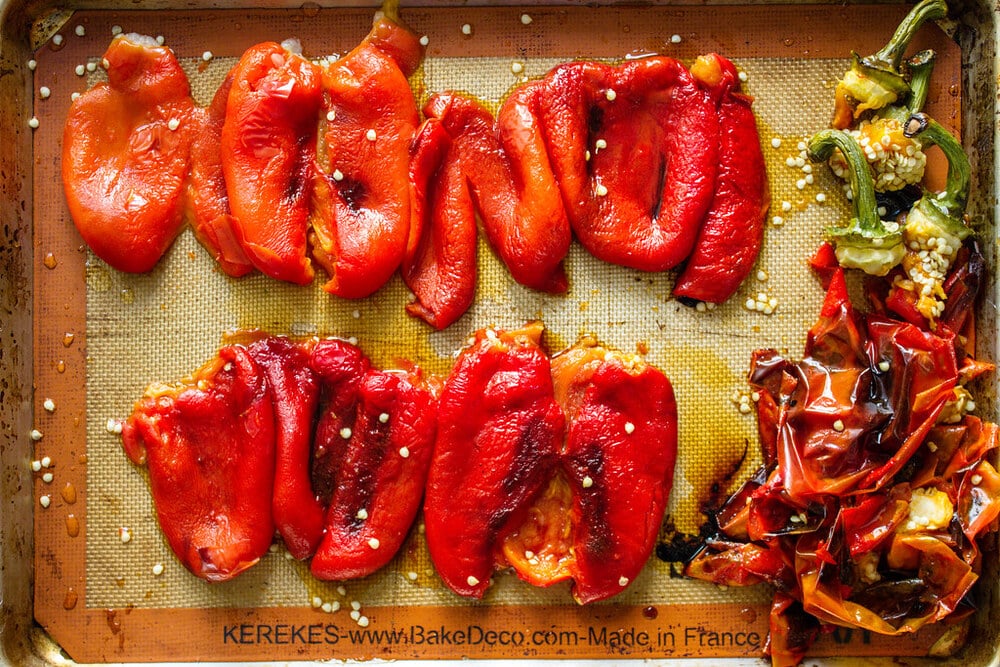
Above, the peppers were roasted whole, with the stem, seeds, and skin removed. Once steamed, I brought them back to the baking sheet to finish the final steps (again, saving a dish to wash).
This is a fairly easy and juicy process. Do refrain from cleaning your peppers under running water, or you’ll remove much of the wonderful roasted flavor you’ve worked so hard to get. If you don’t remove all of the seeds, it’s okay.
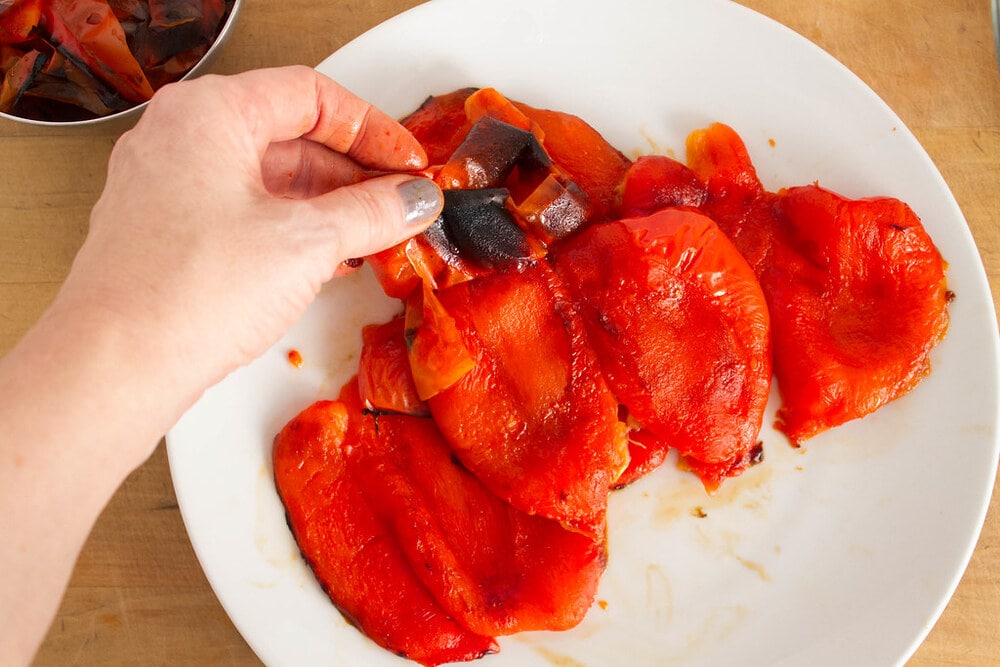
Here you see the peppers that were halved and roasted. I’ve used the plate that I covered the bowl with to steam. This was the easiest of all, with not a lot of juices and no seeds to deal with. Just peel the skin, and you’re done. It’s ok to sneak in a few bites too. :)
Once peeled, cut the peppers into sections, maybe 4 – 6 sections per pepper depending on what you’ll be using it for. If canning, save the pepper juices.
How To Store Roasted Red Peppers
Your freshly roasted and prepped bell peppers can be store in the refrigerator, freezer, or canned. This guide to storing roasted peppers will break it all down for you, and you can use whatever method best suits your needs!
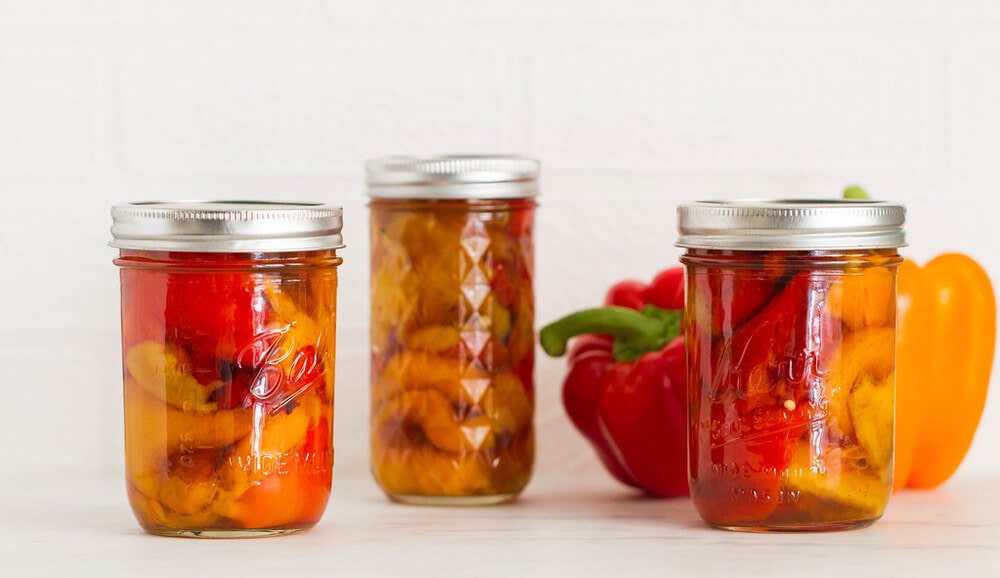
Refrigerator
Storing roasted peppers in the refrigerator is great for short-term storage. Depending on how you store them, they will stay fresh for up to two weeks.
- Keep leftovers in an airtight container in the refrigerator for up to a 5 – 6 days.
- If you coat them with a little oil they will stay fresh for up to 2 weeks. You can even add some of the pepper juices to the container.
- To always be safe, at the first sign of mold or spoilage, throw away immediately.
Freezing
Freezing is my favorite method of storing roasted peppers for long-term storage, as it’s super easy to do, and they thaw out amazingly well! This method of storing is a neutral way of keeping the full roasted flavor intact as they won’t be tainted with any other flavors.
- Freeze your peppers in a tightly sealed, freezer-safe container. I would suggest cutting and placing a small piece of parchment paper between the peppers for easy removal.
- To thaw, leave on the counter for a few minutes or let thaw in the refrigerator. They thaw out pretty fast once removed from the freezer.
- Peppers can be kept in the freezer for up to 2 months.
Vinegar Method
This method requires storing your peppers in a jar with a pinch of salt, vinegar and pepper juices. The result will leave your peppers with a little bit of tang from the vinegar, in some cases it may overpower them, but it’s a great way to store roasted bell peppers for long periods. Use these peppers for sauces, dips, and soups.
- To do this you’ll want to sprinkle your peppers with a generous pinch of mineral salt and mix well.
- Place 1/2 inch of vinegar at the bottom of your pint sized mason jar, add peppers leaving about 1 1/2 inches headspace.
- Using the handle of a spoon or fork, poke along the inside edges of the jar to release air bubbles (this is important), pour reserved pepper juices over top so peppers are completely covered, leaving 3/4 inch room. If you don’t have a lot of pepper juices, use vinegar.
- Add about 1/8 inch of olive oil over top to keep air out, leaving 1/2 inch headspace.
- Seal and place towards the back of the refrigerator. Peppers will be good for up to 2 months, maybe even a little longer.
- If you see any sign of mold or spoilage, throw away immediately!
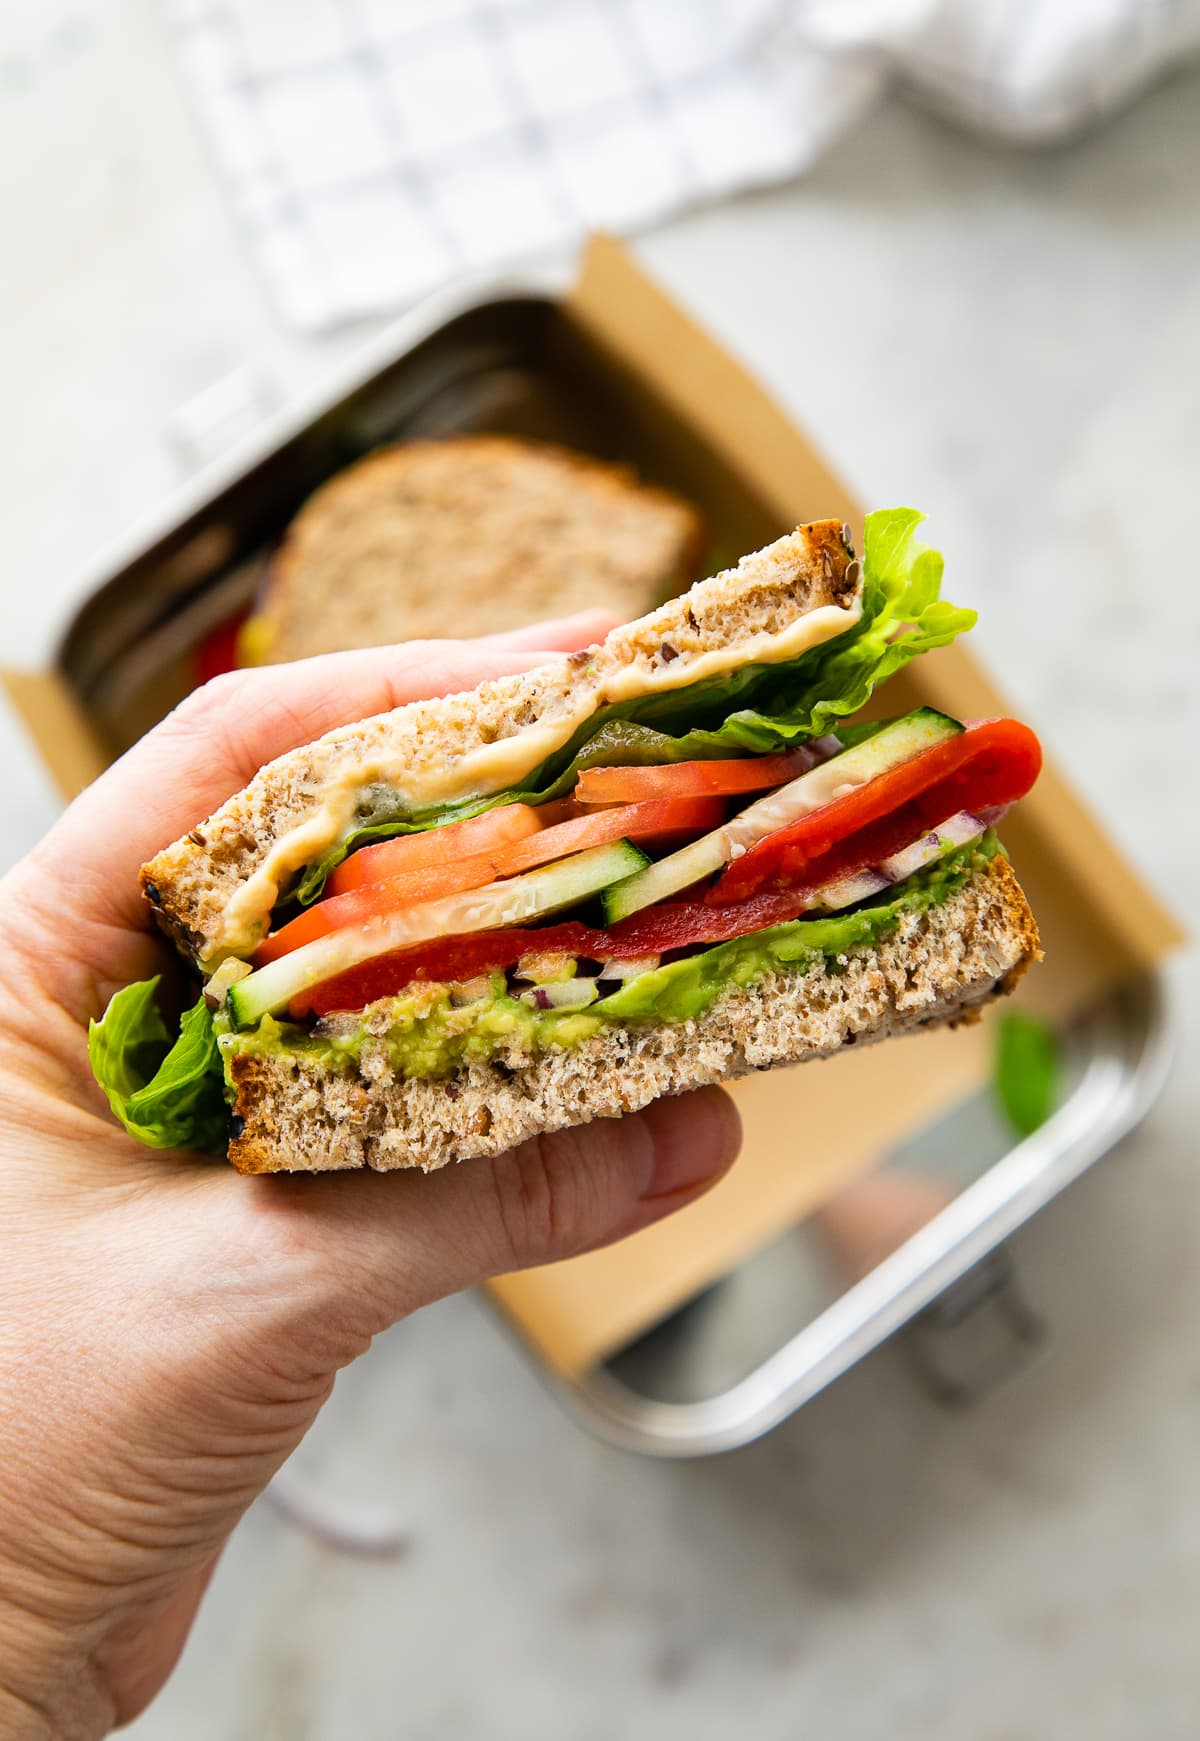
How To Use Roasted Red Peppers
Once you’re all finished, here are a few great recipes using roasted peppers!
Gather your peppers and get roasting!
PrintHOW TO ROAST & STORE RED PEPPERS (OR ANY PEPPER REALLY!)
A guide to the different methods of prepping, roasting and storing your roasted peppers. Whether making a few or a large batch, this guide will make your roasting experience a good one!
- Prep Time: 10 min
- Cook Time: 40
- Total Time: 50 minutes
- Category: How To
- Cuisine: Vegan
Ingredients
- 1 – 8 peppers, any color
If making a large batch and storing in the freezer
- parchment paper
- air tight containers that are freezer safe
For storing in jars
- vinegar (plain, balsamic, white/red wine, or apple cider)
- mineral salt
- olive oil
- clean pint sized mason jars
Instructions
PREPPING PEPPERS:
There are two ways to prepare your peppers for roasting.
- The first is to simply roast the whole pepper, seeds, stem and all. (This will work with all roasting methods.)
- The second is to slice the peppers in half lengthwise, remove the stem and seeds, and place on the baking sheet cut side down. (Use this method for the oven method and/or when using a baking sheet. These peppers require no flipping, only rotating of the baking sheet. This is my favorite way of roasting peppers.)
ROASTING METHODS:
Oven: Preheat oven to 475 degrees F. Line a baking sheet with parchment or a Silpat.
Place peppers on baking sheet. Bake 4 – 5 inches from the flame. If using an electric oven or there is no flame, place baking sheet on the middle rack. Roast peppers for 40 minutes, turning at least once during cooking using sturdy tongs (if peppers are sliced in half no need to turn, just rotate the baking sheet 180 degrees). They are ready when charred/blackened and blistered. Whole peppers will still be full of air and puffy once removed from the oven. As the peppers cool they will deflate and become wrinkly looking.
Broiler: I used to have an oven where the broiler was underneath the oven, now mine is in the oven. Either way, turn broiler to medium – high (or 500 degrees if yours is by numbers) and char peppers turning every so often until browned and blackened. If you’ve prepped your peppers by slicing in half, no need turn the peppers, simply adjust the baking sheet turning it to get all the peppers charred. This may take anywhere from 15 – 25 minutes.
Open Grill: Place whole peppers on their sides over an open flame on the grill, turning every now and then until nicely charred all over. Depending on how big your grill is will determine how many you can do at one time.
Stove Top: If roasting just 1 or 2 peppers, you can roast it over the gas burner of your stove (I suppose you could do 4 peppers utilizing each burner). Place pepper on its side and adjust the flame so it ‘licks’ the peppers. Keep an eye on it and turn it as needed to blacken and char, about 15 – 20. This tends to be a more time consuming method since you have to be so watchful.
STEAMING & PEELING:
While peppers are hot from the oven, carefully place them in a bowl and cover with a plate, or use a pot with lid. The goal is to steam the peppers making the skin peel easily. Let the peppers steam for about 30 minutes. Once peppers are cool, remove the skins, stems and seeds. I find it easiest to peel the pepper from the bottom to the top. A few seeds left are fine. Do not run peppers under water to clean, you’ll lose most of the roasted flavor that you worked so hard get. Keep as much of the pepper juices as you can if storing leftovers.
From here you can use right away to make hummus, romesco, soups, layer on sandwiches and toss in salads, etc.
STORING:
Rerfrigerator: Great for short term storage.
- Keep leftovers in an airtight container in the refrigerator for up to a 5 – 6 days.
- If you coat them with a little oil they will for a couple of weeks. You can even add some of the pepper juices to the container.
- To always be safe, at the first sign of mold or spoilage, throw away immediately.
If storing for longer, you have a couple simple options:
Freezing: This is my favorite method of long term storing, as it is not blended with any other flavors, it’s super easy to do, and they thaw out amazingly well.
- Freeze your peppers in a tightly sealed container. They thaw out pretty fast once removed from the freezer making this a nice way of preserving your precious peppers.
- This method of storing is a neutral way of keeping the full roasted flavor intact as they won’t be tainted with any other flavors.
- I would suggest cutting and placing a small piece of parchment paper between the peppers for easy removal.
- Will last up to 2 months.
Vinegar Method: This is method will leave your peppers with a little bit of tang from the vinegar, in some cases it may overpower them, but it’s a great way to store them. Use these peppers for sauces, dips, and soups.
- Place peppers in a jar with a little salt, vinegar and pepper juices.
- To do this you’ll want to sprinkle your peppers with a generous pinch of mineral salt and mix well.
- Place 1/2 inch of vinegar at the bottom of your pint sized mason jar, add peppers leaving about 1 1/2 inches headspace.
- Using the handle of a spoon or fork, poke along the inside edges of the jar to release air bubbles (this is important), pour reserved pepper juices over top so peppers are completely covered, leaving 3/4 inch room.
- Add about 1/8 inch of olive oil over top to keep air out, leaving 1/2 inch headspace.
- Seal and place towards the back of the refrigerator. Will be good for up to 2 months, maybe even a little longer.
- If you see any sign of mold or spoilage, throw away immediately!
FOLLOW TSV on Facebook, Instagram, Pinterest or RSS for more healthy & delicious vegan food!

I broiled mine yesterday at 500 degrees. 2 things I did to be successful: I moved the oven rack to the top and kept door popped open. I used to saute them on the stove but it created A LOT of smoke but broiling didn’t.
Can you add garlic cloves to the jars?
Great question, Sharon! Yes, you can add garlic cloves to the jars for a nice garlicky infusion. I love this idea! Enjoy!
I have made these roasted peppers twice over the holidays by baking in the oven. They were a hit as an extra touch for gifts! Nothing better than something from the kitchen.
What is mineral salt ?
PS when I was a kid that was my job for my mother: Roasting peppers on a long hotdog fork using a wood fire. Used to burn them good.
I did this on a tray with my Silpat mat. Now I have black char on my mat that I can’t get off. Do you have any tips for cleaning the Silpat mat? And, the peppers were delicious!
Oh no! You can make a paste made with baking soda and warm water, spread the mixture overtop the problem areas, and let rest for 10 – 15 minutes, then gently rub away. You can also try soaking it in an acid such as lemon juice or apple cider vinegar to help remove the char. I hope that helps!
Hi, thank you so much for sharing this, great to learn how to roast peppers so easily! Quick question about storing these in a mason jar. How does one get enough “pepper juice” required to fill up the various jars, especially if doing so on the stove? Also, how long will the peppers last if stored in this method? Do they still need to be refrigerated or can one keep them outside? (I live in a tropical country) Thanks in advance 🙂
Great questions, Dash! The stovetop method won’t yield as much pepper juice as in the oven. You don’t have to have pepper juice. Just if it’s there, it’s nice to add into the container. You don’t have to refrigerate them, just once opened after storing, they will need to be refrigerated. I would keep them in a dark, cool area for maximum lasting freshness. They should last up to 6 months. But as noted in the recipe card, if you see any signs of mold or smells, discard them immediately. I hope that helps!
Why do you remove the skins? Is this step necessary?
You don’t have to remove the skins if you don’t want to. The skins are typically removed so the pieces of red pepper are soft, tender, and fleshly. If leaving the skins on you will leave in take a little extra fiber and nutrition. Either way is fine. Hope that helps!
Thank you for the most helpful post. Used the stove top method. And I found that, when cooled a bit, the skins slipped right off with a light touch. Cannot imagine needing to steam them. Also highly recommend the storing deep in olive oil option. The peppers soak up flavor from the oil AND the oil is sooo good after the peppers sit in it a while. A double treat.