Vegan Kimchi
Vegan Kimchi—Tangy and delicious, this addicting kimchi recipe uses cabbage, apple, green onion, gochugaru, garlic, and ginger. It is a flavorful side dish or condiment that is easy to make!

Welcome to the world of vegan Kimchi!
This tangy, spicy dish is a staple in Korean culture and is typically eaten with every meal. In fact, kimchi is their national dish, and once you become accustomed to its unique characteristics, you may find yourself hooked!
What Is Kimchi?
Kimchi is a mixture of vegetables and spices that go through a fermentation process. Fermenting foods have long been known for their health benefits. Foods like kimchi, kombucha, sauerkraut, pickles, miso, and tempeh are all probiotic powerhouses!
Fermenting creates good bacteria, which work directly in the gut to balance and regulate a variety of bodily functions. It can help with IBS, boost your immunity, aid in weight loss, and even promote better skin.
Kimchi is very easy to make and just takes patience to get through the first day or two. This simple condiment is worth the wait and is a beneficial mixture to add to your weekly meal plans!
In the last couple of weeks, I’ve tried 2 different spice blends, both delicious and noted below. I’ve also used different-style cabbages, all great. I’ve even added shredded carrots, but will save that for another recipe.
So without further ado, let’s make kimchi!
Ingredient Notes
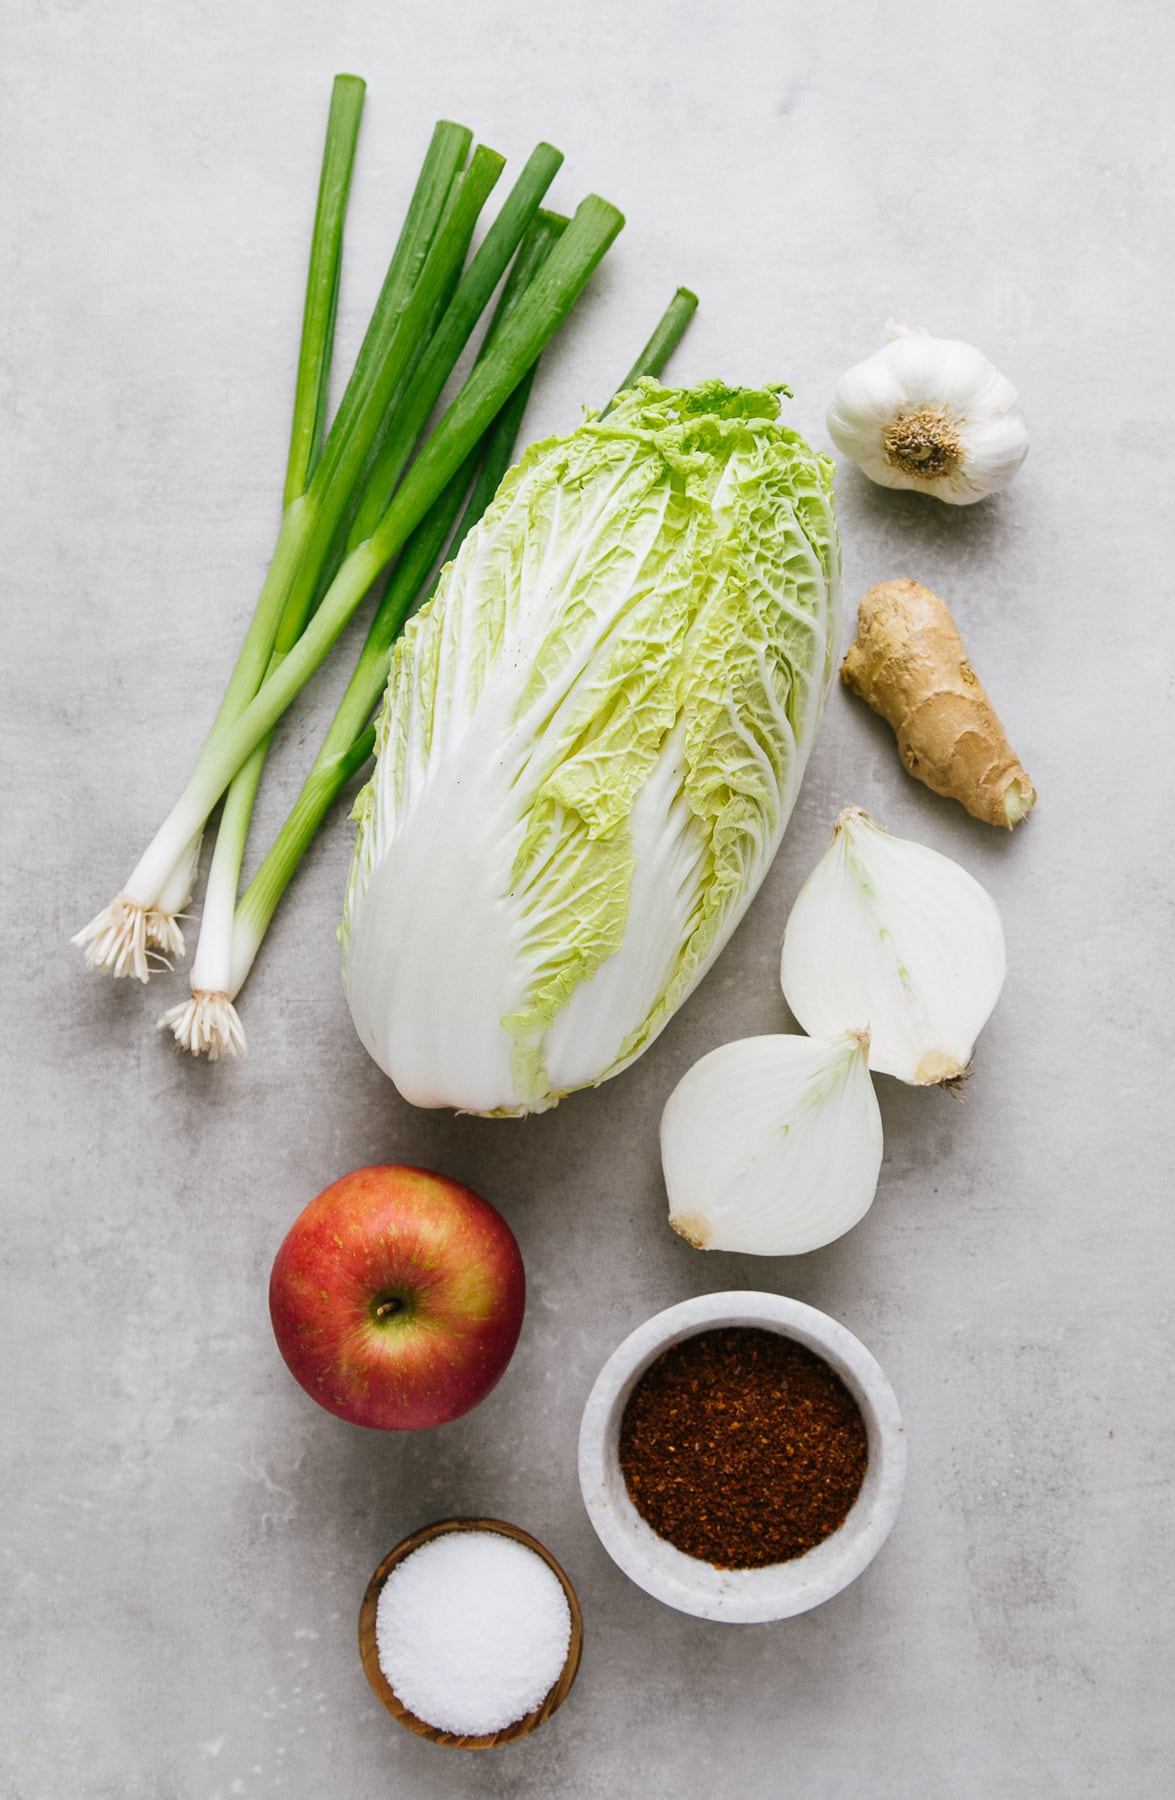
Here you’ll find the ingredients needed to make vegan kimchi, plus substitution ideas.
The Produce
- Cabbage – This is the base. Here I used Napa cabbage, which is traditional, but you can use green or savoy with excellent results as well. You may even find you like one of these other cabbages better.
- Kosher salt – Stick with using kosher, pickling, or other course salts like sea or mineral salts that do not contain iodine. Iodine, with its antimicrobial properties, may interfere with proper fermentation.
- Apple – You can sub with a pear or pineapple or 2 teaspoons of organic pure cane sugar. Fermentation requires some sort of sugar.
- Onion – We will use white onion and green onions (scallions).
- Garlic – Use fresh, and for convenience, bottled minced garlic is great too.
- Ginger – Use fresh or packaged minced garlic (we love this garlic paste).
The Spice
For the spice, you’ll want to source Korean red pepper powder or flakes known as gochugaru (Wikipedia). You can find it at Asian grocery stores or online (affiliate link). I just tried this one from Mother In Laws Kimchi (affiliate link) and thought it had a nice flavor. The peppers are not overly spicy, but I do find that the spiciness intensifies as the kimchi ages.
I’ve also replaced the Korean red pepper with a mixture of cayenne pepper and sweet Hungarian paprika, using 1 tablespoon each, and it was delicious as well.
How To Make Vegan Kimchi
It only takes a few simple steps to make vegan kimchi, all of which are super easy. Following is a breakdown of the steps involved. If you have any questions, be sure to ask in the comments!
(Note – The full printable recipe is at the bottom of this post)
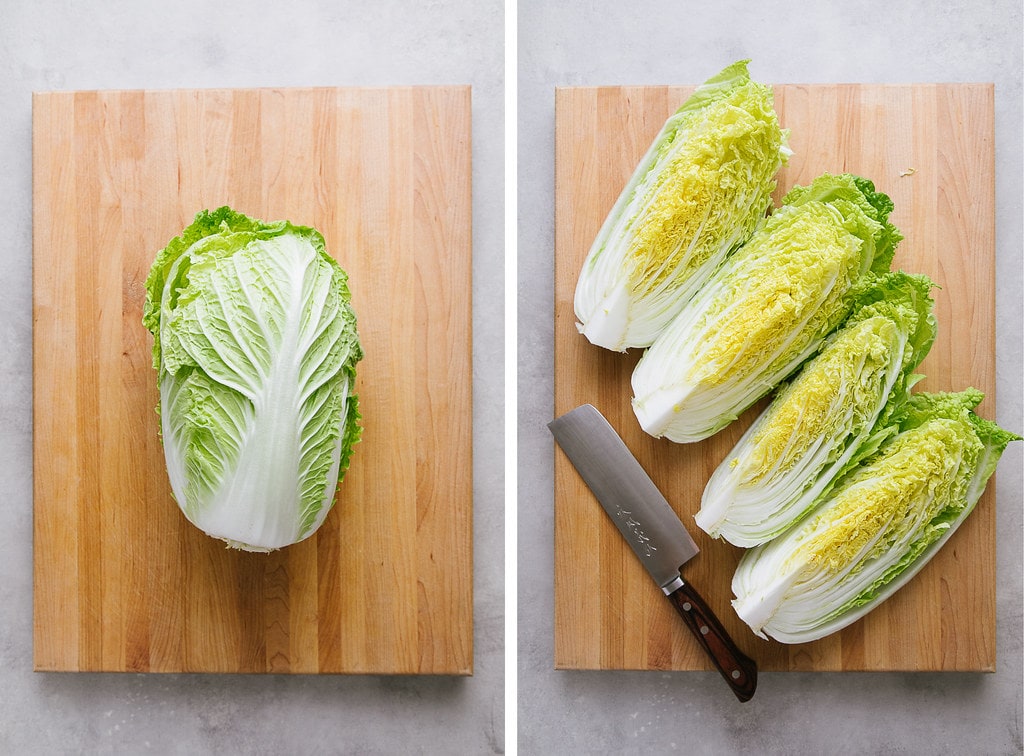
Cut The Cabbage
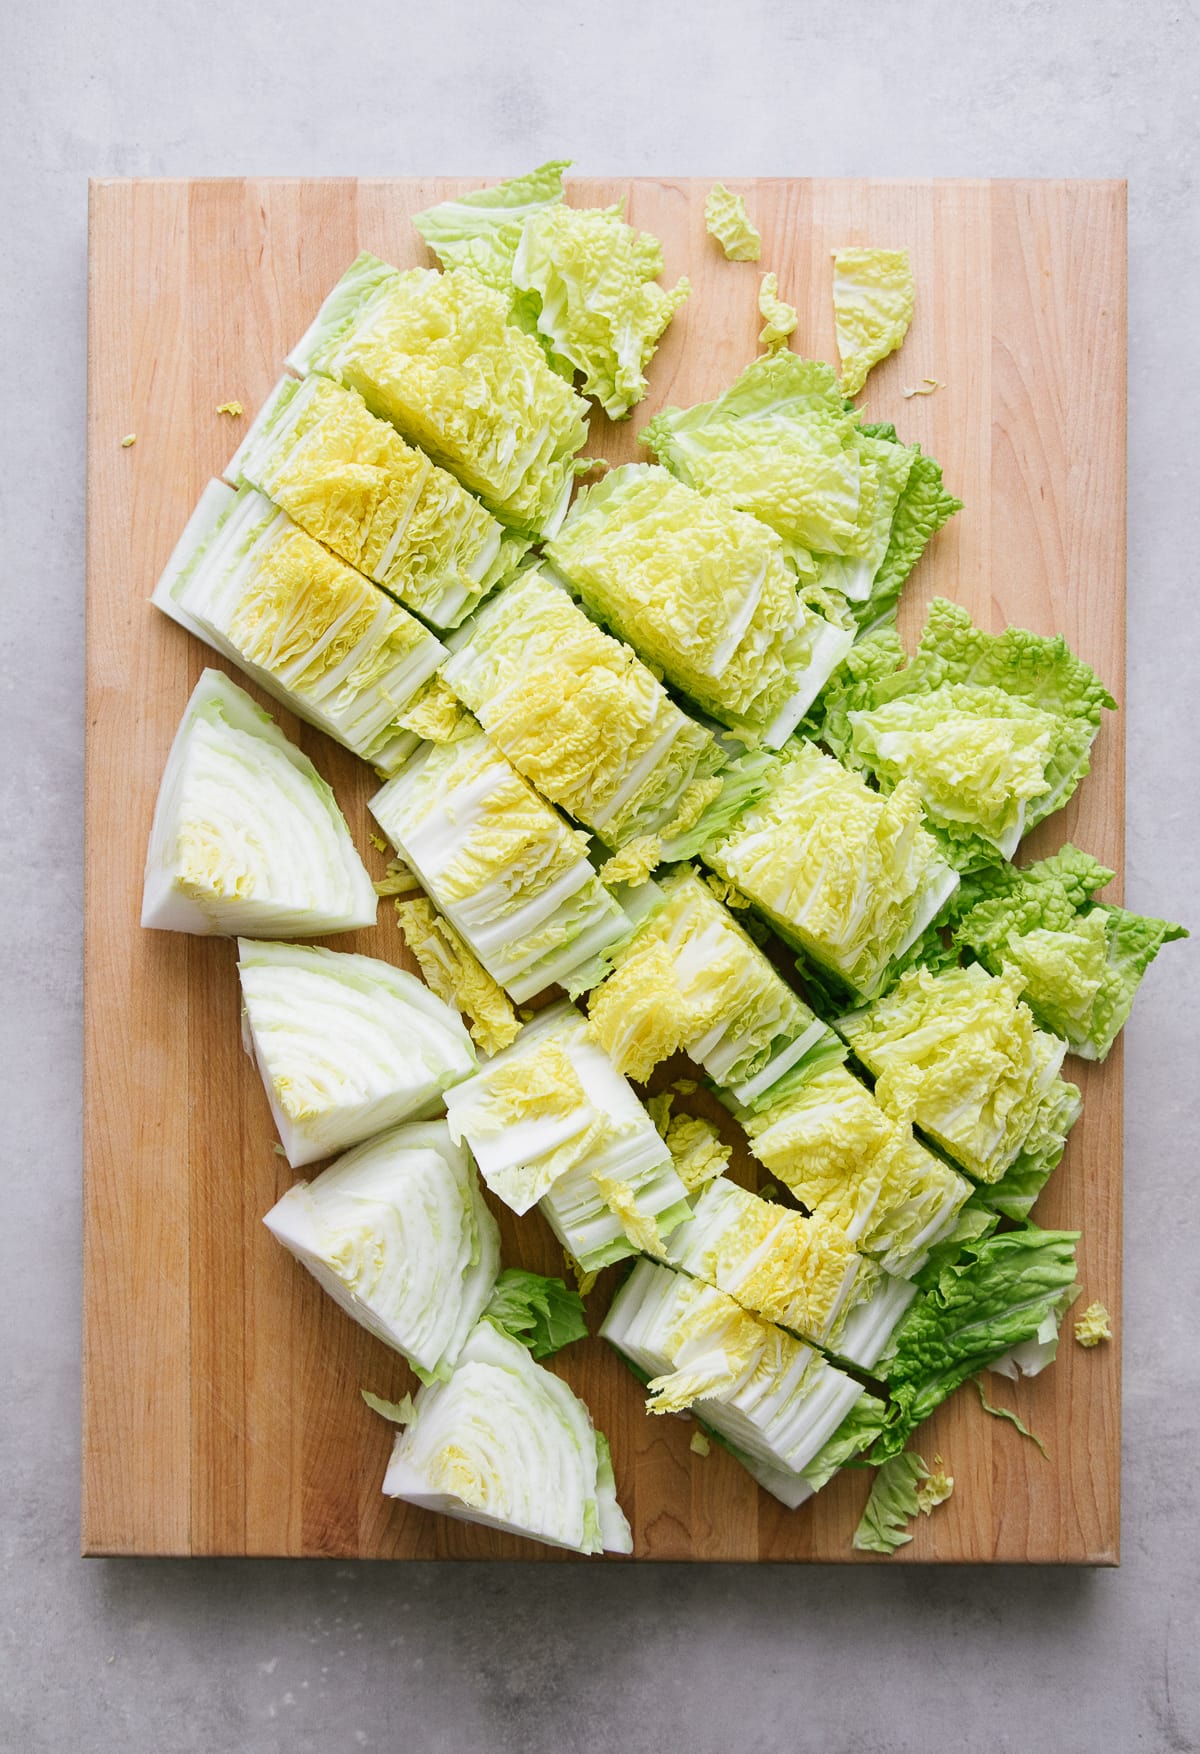
- Quarter the cabbage.
- Slice quarters laterally into 2-inch chunks, as shown above.
- Discard the very bottom cuts with the core.
Cabbage will shrink a bit more during the fermentation process, so there is no need to chop it too small. But you may consider slicing the pieces with thick stalks (mainly the pieces towards the bottom). Slicing them in half will do fine.
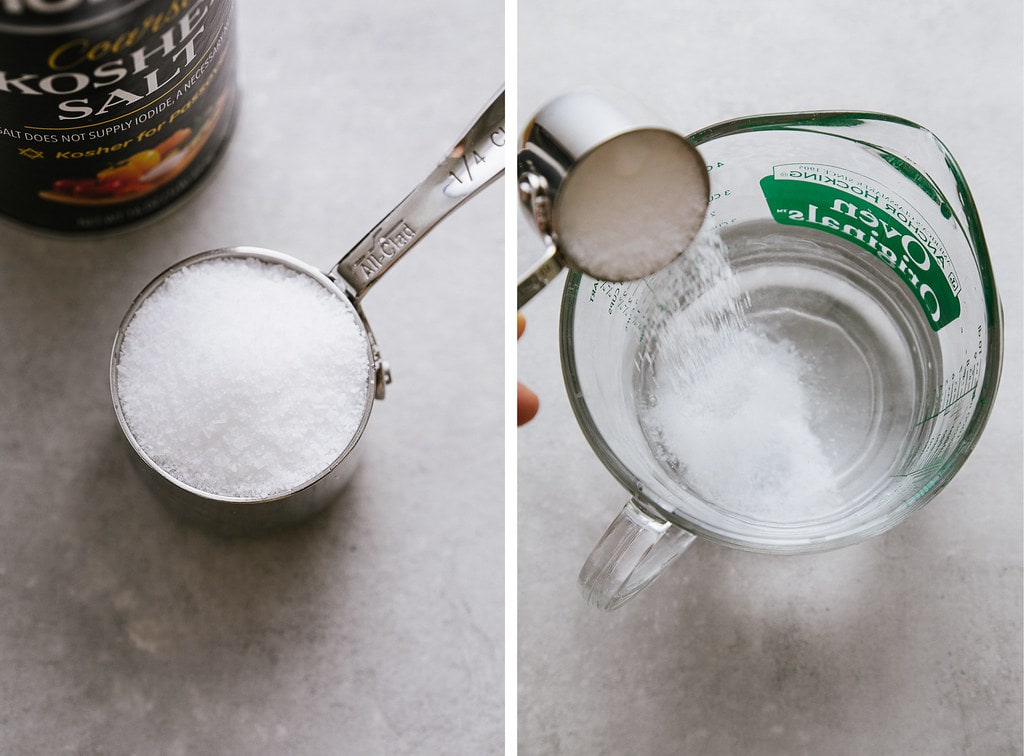
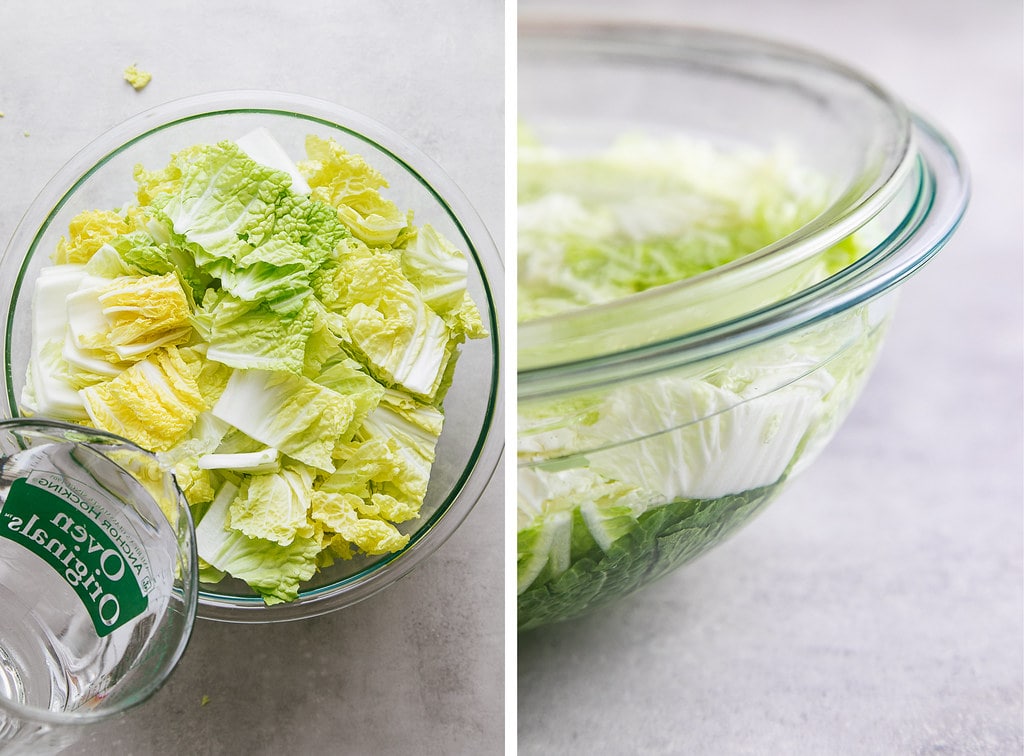
Brine The Cabbage
Soaking the cabbage in salt water, aka brining, will help draw moisture from the plant cells, causing the leaves to wilt. Soaking will move the preparation along a lot faster than other methods used and is my preferred method.
- Dissolve the salt. Combine salt with 2 cups of lukewarm water, stir to dissolve salt, water will turn clear.
- To brine cabbage for kimchi. Place the cabbage in a large bowl, pour the salt water overtop, add more water, and cover with a dish (placing a weighted object if needed) on top to submerge the cabbage. Let soak for at least 2 hours, up to 12 hours if you like, but I find 2 hours is plenty. Rinse the cabbage well to remove excess salt.

Puree Kimchi Seasoning
- To make the vegan kimchi seasoning, add the apple, onion, ginger, and garlic to a food processor or blender and puree, making a sweet and zesty mixture.
The sugar from the apple will help in the fermentation while adding a hint of sweetness.
If you don’t have an apple, some recipes call for a teaspoon or two of sugar in place of the apple (I will save that method for another kimchi recipe). I like the thought of using an apple, but if you’re in a pinch without an apple in sight, use 2 teaspoons of organic pure cane sugar, coconut sugar or sugar in the raw – just the purest sugar you can find.
You may like to add a bit of water to the mix as well, about 2 – 3 tablespoons.


Mix Kimchi
Now you’re ready to combine the cabbage and seasonings.
- In the bowl the cabbage was soaked in, add the cabbage, green onions, puree, and gochugaru, mixing well to coat.
You can use your hands to mix, gloves are recommended if you do. I used a wooded spoon.
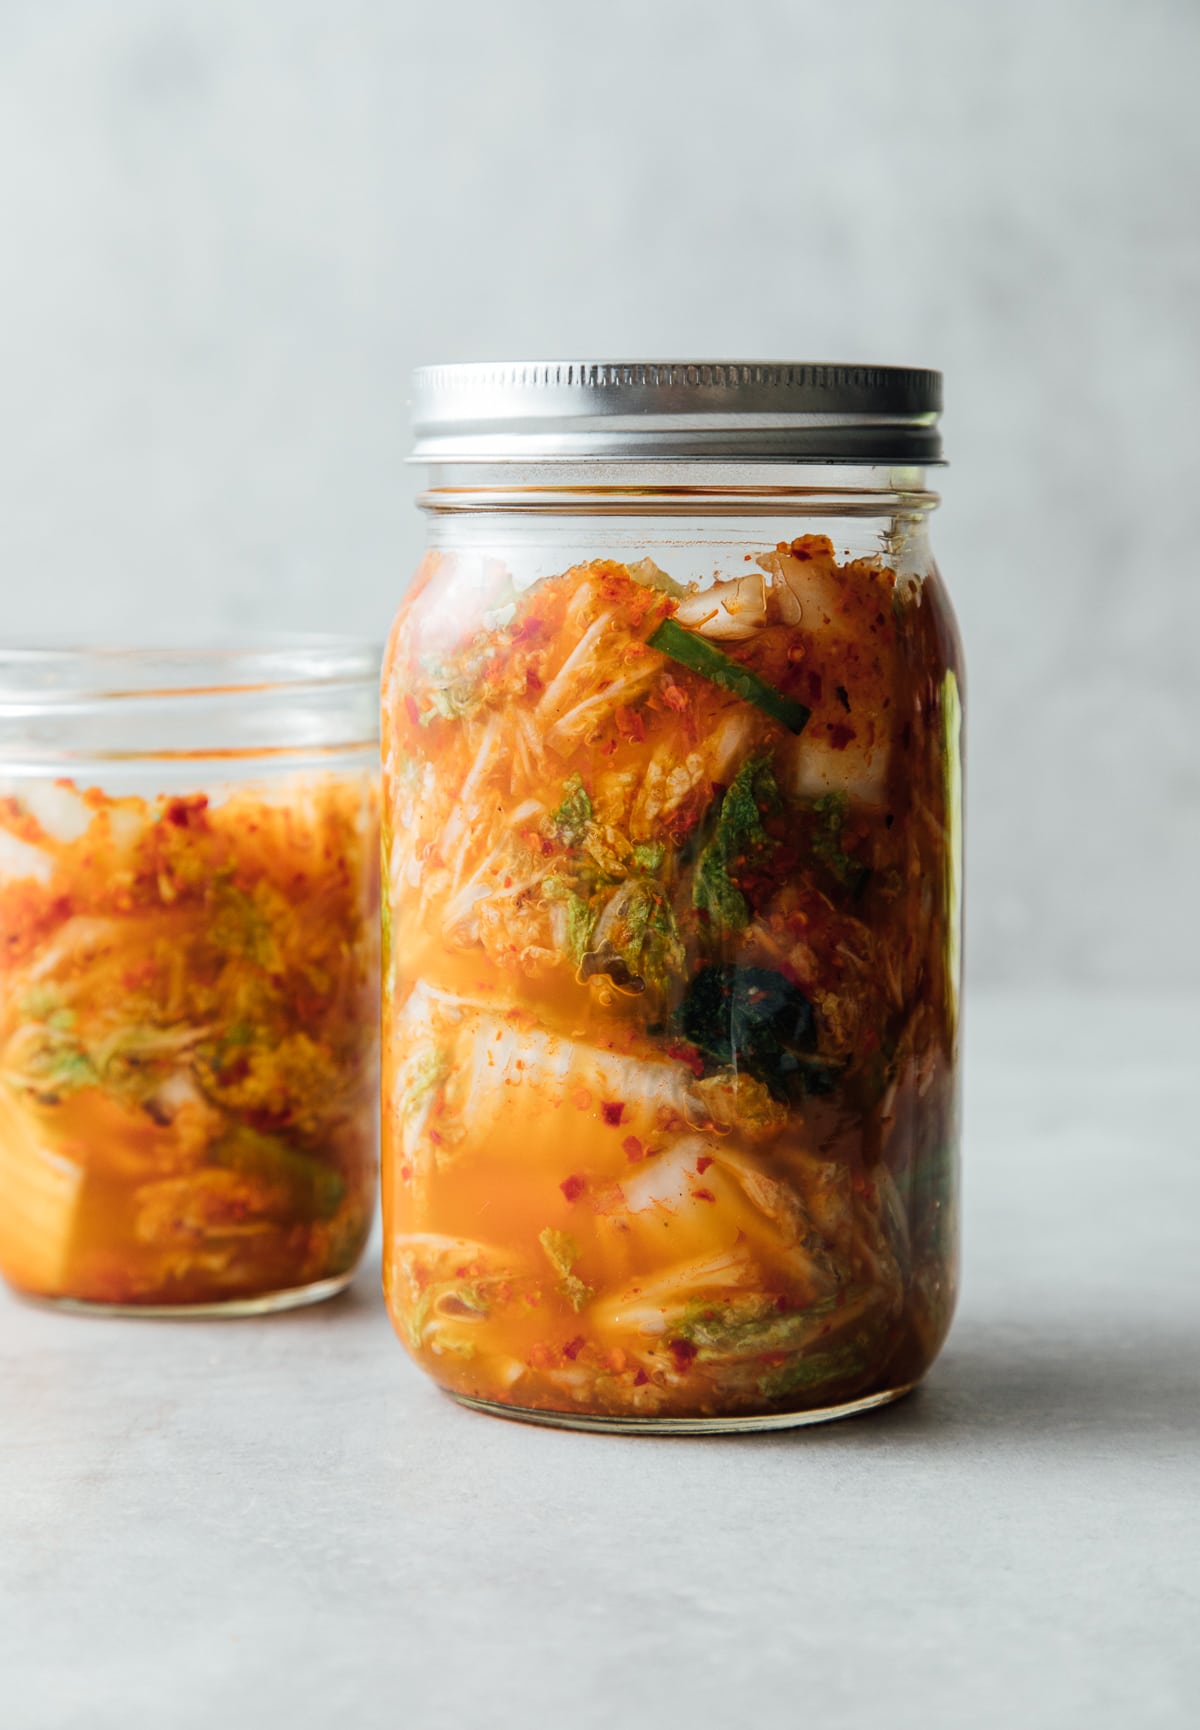
Fermentation + Storage
Kimchi relies on fermentation, or the digestion of sugars into acid, gases, or alcohol (not the tipsy kind). This process is what gives kimchi its hallmark effervescence, tanginess, and tasty funk, captured through the natural dynamics between bacteria and their environment.
Here is how to pack and start the fermentation process:
- Pack. Place the kimchi into glass jars or containers, packing down the best you can to close any air pockets, leaving 1 inch at the top for gases and air. Add a little of the leftover juices or brine over the veggies to just cover, and seal with a lid.
- Start fermentation. Place on the counter and let ferment for 24 – 36 hours. If it’s hot, store it in a cool area such as a pantry.
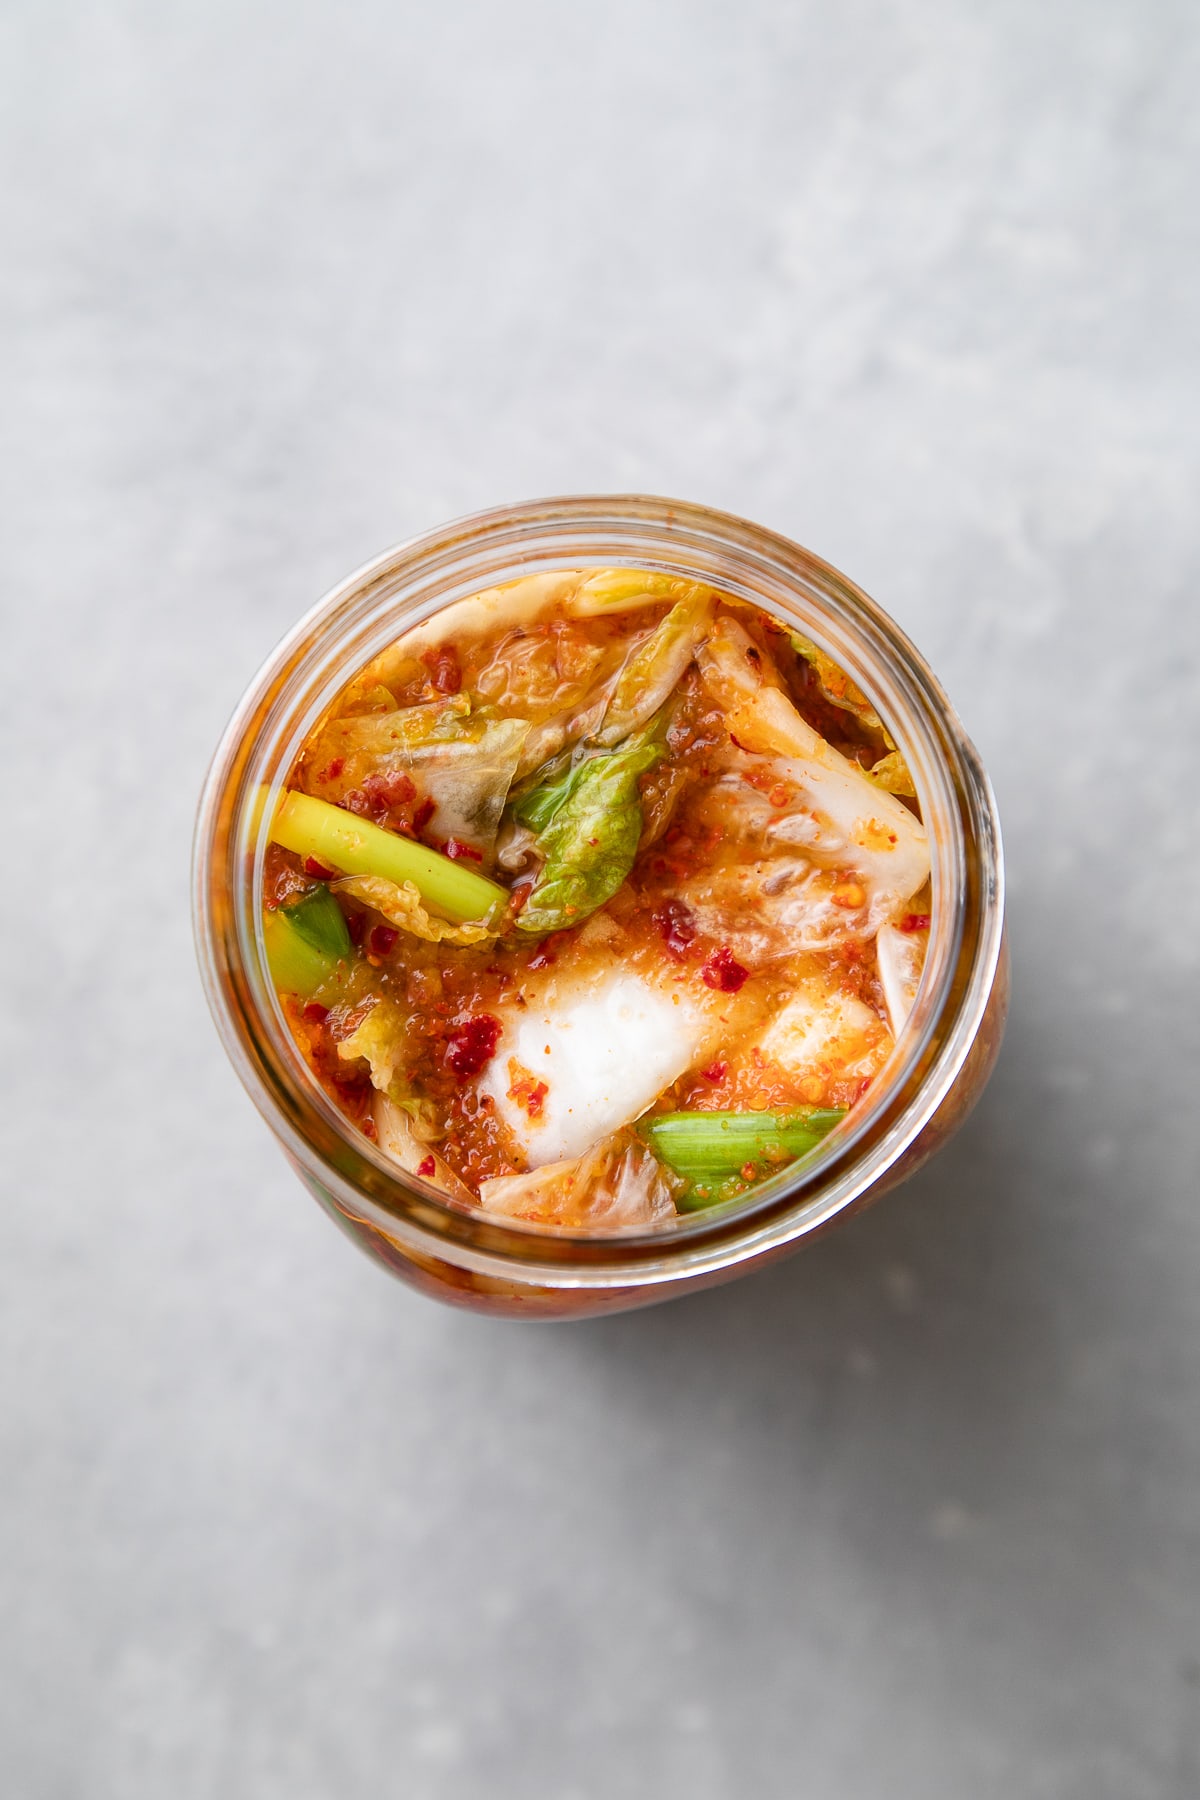
- Check the process. After 24 hours check and pack down the kimchi. You may notice it bubbles as it ferments. This is normal and a good sign you’re doing it right. Kimchi shouldn’t taste bad, it should have a tangy, slightly sour, and crisp flavor.
- Store. Move the kimchi to the refrigerator, where it can be kept for at least a month, maybe 2. It will continue to ferment and is best if stored towards the back of the refrigerator.
Top Tips
- Start with the freshest high-quality produce possible.
- Use non-iodized salt when brineing the cabbage for proper fermentation. The top choice is Kosher salt and any other course salts such as sea salt.
- Always check for odors or bacteria. If the kimchi has a foul smell or signs of mold or bacteria during the fermentation process or during storage, throw it out immediately. Fermenting is a relatively safe preserving method, but things can still go wrong.

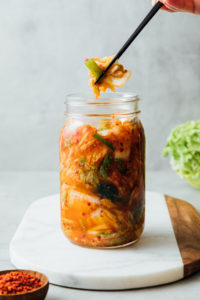
Serving Suggestions
With its spicy, pungent flavor and versatility, kimchi is an addiction for me and keeps me coming back for more. If you’ve never tried it, I hope you’re inspired to get in the kitchen and give it a try, or pick up a ready-made vegan version and enjoy ASAP!
Here are a few ways to enjoy vegan kimchi:
- It’s great with a side of rice or used in Kimchi Fried Rice
- Perfect for these Kimchi Tofu Scramble Tacos
- Add it as a side to Vegetable Fried Quinoa
- Serve with Tempeh Chow Mein
- Add a bit to soups, such as this Simple Miso Noodle Soup with Tofu or Red Hot Miso Noodle Soup
If you try this easy vegan kimchi recipe, please let me know! Leave a comment and rate it below. I love to hear what you think, or any changes you make.
VEGAN KIMCHI
This easy Vegan Kimchi recipe is 100% whole food plant based and full of spicy, tangy flavor! It’s a natural probiotic for a healthy and delicious condiment!
- Prep Time: 36 – 48 hours
- Total Time: 0 hours
- Yield: Makes 3 – 4 cups 1x
- Category: Side, Condiment
- Method: ferment
- Cuisine: Korean, Asian
- Diet: Vegan
Ingredients
- 1 medium Napa cabbage, about 2 lbs (savoy, green or any combo works too)
- 1/4 cup kosher salt (non-iodized sea salt or other coarse salt is great too)
- 6 cups water
- 3/4 sweet apple (I used fuji), chopped
- 1/2 small white onion, chopped
- 1 1/2 inch ginger, chopped
- 1 – 2 cloves garlic
- 3 tablespoons gochugaru (Korean red chili powder) or 1 tablespoon each cayenne & Hungarian paprika
- 3 – 4 scallions (green onions), sliced 1 inch
Instructions
Preparing Cabbage: Quarter cabbage and chop laterally into about 2 inch pieces. Place cabbage in an extra large bowl or pot. Combine salt with 2 cups of lukewarm water, stir to dissolve salt. Pour salt water over the cabbage and add remaining 4 cups, stir to mix. If you can, place a plate or circular baking dish of sorts on top to submerge the cabbage (I used a pie dish), place something with a good amount of weight on top to hold down if necessary (it’s not completely necessary but will help to evenly wilt the cabbage). Give cabbage a good mix every now and then. Let soak for 2 hours, up to 12 if you like. I found that 2 – 4 hours was enough and didn’t see much change between the two times.
Make your seasonings: While cabbage is soaking, combine apple, onion, ginger and garlic in food processor/blender and process until fairly smooth.
In a small bowl, mix the chili pepper with a small amount of water to make a wet paste. You can just as easily blend it with the apple/onion mixture adding a couple tablespoons of water as well.
Mix everything together: Once cabbage is ready, drain water, reserving 1/2 cup, and rinse well. Place cabbage back in large bowl, combine with the scallions, apple/onion mixture and chili paste. Mix well to coat all pieces. Either use your hands (with gloves on pref to protect from the chili pepper) or simply use wooden spoons to toss everything.
Packing: Place the kimchi in glass jars or containers with lid, pack down the best you can to close air pockets and leave about an inch at the top for air and gases. Top with remaining juices, add reserved brine if needed to cover vegetables.
Fermenting: Let kimchi sit at room temp (or in a cool place like a pantry or closet if weather is extremely warm) for 24 – 36 hours. After 24 hours, open kimchi and pack the mixture down with a spoon (the cabbage will have likely shrunk and you’ll have more liquids). You may notice it bubbling, this is perfectly normal as the kimchi is fermenting. As your kimchi ferments the flavors will develop, taste every 24 hours and place kimchi in the refrigerator once you’re happy with the taste and to slow fermentation, usually after 36 – 48 hours. It should be tangy, spicy and slightly sweet. After moving to the fridge, it’s best used within a month, maybe two.
Makes about 3 – 4 cups
Serve with rice, use in Kimchi Fried Rice or make Kimchi Tofu Scramble!
Notes
Practice makes perfect with kimchi. You may find you like it more or less spicy. After a few tries you’ll find the perfect mix to suit your taste. Also, how fermented you like your kimchi will take practice as well. The weather will also play a role in how fast/slow your mixture will ferment. Higher temperatures will progress fermentation while cooler will slow it down.
Apple substitute: If you’re in a pinch without an apple in sight, use 2 teaspoons of organic pure cane sugar, coconut sugar or sugar in the raw, just the purest sugar you can find. You may like to add a bit of water to the mix as well, about 2 – 3 tablespoons.
You can also enjoy kimchi fresh right after you mix it and store it straight in the fridge. You may like to experiment by putting half the recipe in the fridge and the other half in the pantry to ferment & sour to see which flavor is your favorite.
Optional ingredients for color and variation: carrots and/or daikon radish (grated or julienned), about a 1/2 cup of each. If using these, add to cabbage when mixing scallions and wet mixtures together.
If using savoy or green cabbage, quarter cabbage, remove core and roughly slice.
If you don’t have glass jars, plastic containers with lids will work just as well. If you have too much room, more than an inch, place plastic wrap over top, but sinking in close to the surface of the kimchi to remove air, and cover with lid.
FOLLOW TSV on Facebook, Instagram, Pinterest, Youtube, Subscribe (email), or RSS for more recipes and inspiration!
Thank you so much for the amazing vegan recipe! I am going to try it using a green cabbage as I am not able to source a napa cabbage in my location. I am sure it will be a success.
Thank you!
Tasha
Enjoy, and do let us know how it goes!
Hello, this recipe is fantastic. It uses the same ingredients as my fav vegan kimchi, mother in law. Those jars are 10 dollars each so I’m glad to have found this!
One question. Can I make this without slicing the leaves laterally? There’s a few recipes I want to use the whole quartered leaf for. Would the brining process take longer or differ at all? Thanks!
Yes, you try making it using whole quartered leaf cabbage. You may want to use a larger container for storage, but everything else should be the same. Enjoy!
I love this recipe! It is so good!
I did just make a batchand only used 1/4 an apple because I spazzed. I assume the apple provides some floral tones and also some sugars for the lactobacillus. Will the fermenting be majorly affected by missing some of the sugars that the recipe usually has?
So glad you are enjoying the recipe, Keith!
The apple is for sugar to help with fermentation, but you should be ok using a little less without much difference. Enjoy!
I’ve just discovered this tangy delicacy and now trying to make it on my own using your recipe. Thank you!!
Great recipe thanks! When I drain the cabbage from the saltwater solution you mention to rinse it. Do I just put it under the sink and rinse it in cold running water?
Yes, you can rinse the brined cabbage under cold running water to remove excess salts. A quick, but thorough rinse should be fine. Enjoy!