Homemade Almond Butter
Learn how to make homemade almond butter made with just 1 ingredient – almonds! It whips up into a delicious creamy nut butter that’s inexpensive, healthy, and so easy to make!
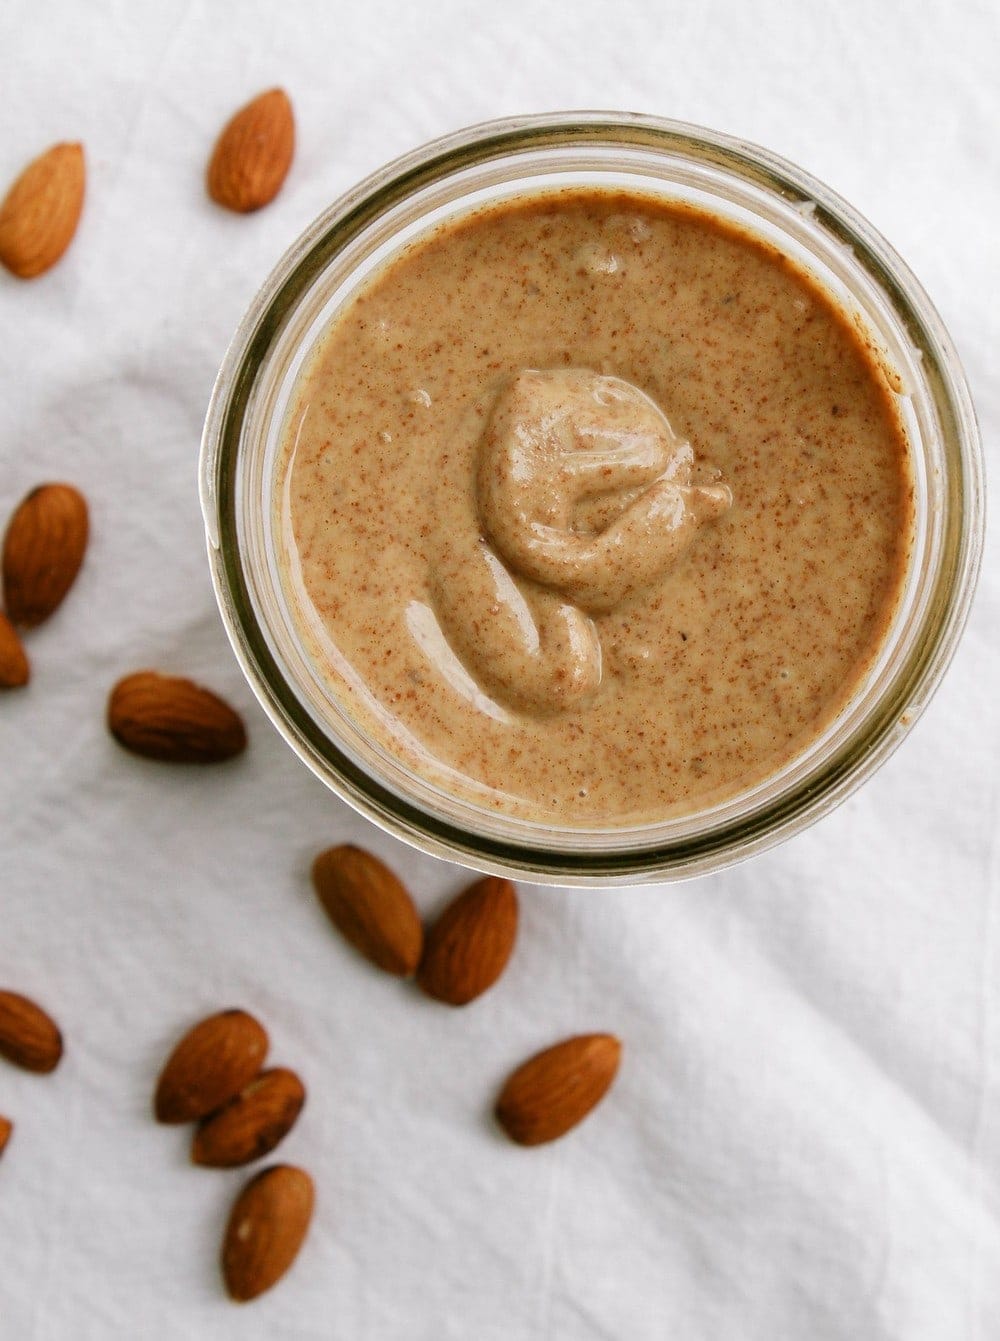
Homemade almond butter is easy to make, healthy, and tastes just as good, if not better, than store-bought. Today, I’m excited to share with you this simple recipe so you can make it in your own kitchen.
I eat it almost every day, someway, somehow! I may have almond butter for breakfast on my morning toast with sliced apples or bananas or as a dessert or snack smeared on pieces of my favorite dark chocolate or apple slices. It’s delicious in more ways than one!
This almond butter recipe requires one simple ingredient and a bit of patience. And in the end, your labor of love will pay off with the best almond butter ever!
This recipe uses one pound of raw almonds, costing about $6 – 7 dollars, which is about the same price, for the same amount of almond butter I currently get from TJ’s. On the high end, I’ve also seen almond butter go for upwards of $16.00. Yikes!
Not only is it cheaper to make yourself, but it’s nice knowing exactly what’s in your almond butter. Plus, you can easily customize it with optional add-ins like cinnamon and pure maple syrup, making a fun and flavorful nut butter.
How To Make Almond Butter
What you’ll need:
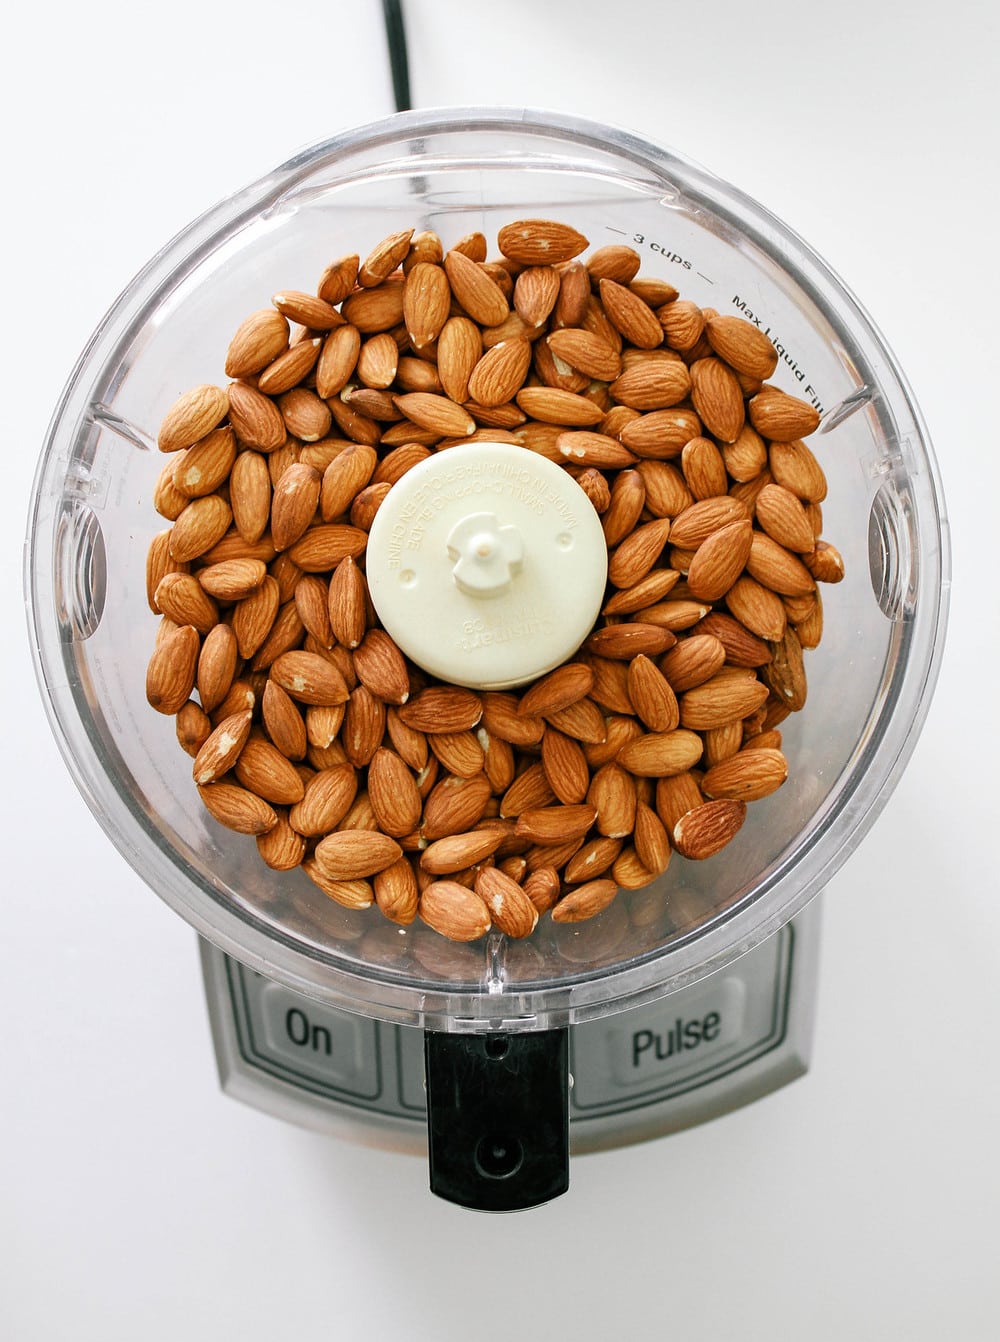
- 1 pound almonds (raw or toasted, pref. unsalted), about 2 1/2 cups
- Good food processor or high-speed blender (I used this Cuisinart Elite Food Processor (affiliate link), using the small bowl)
Now you’re ready to proceed:
Start by adding the almonds to the bowl of your food processor or high-speed blender (as shown above), and start blending.
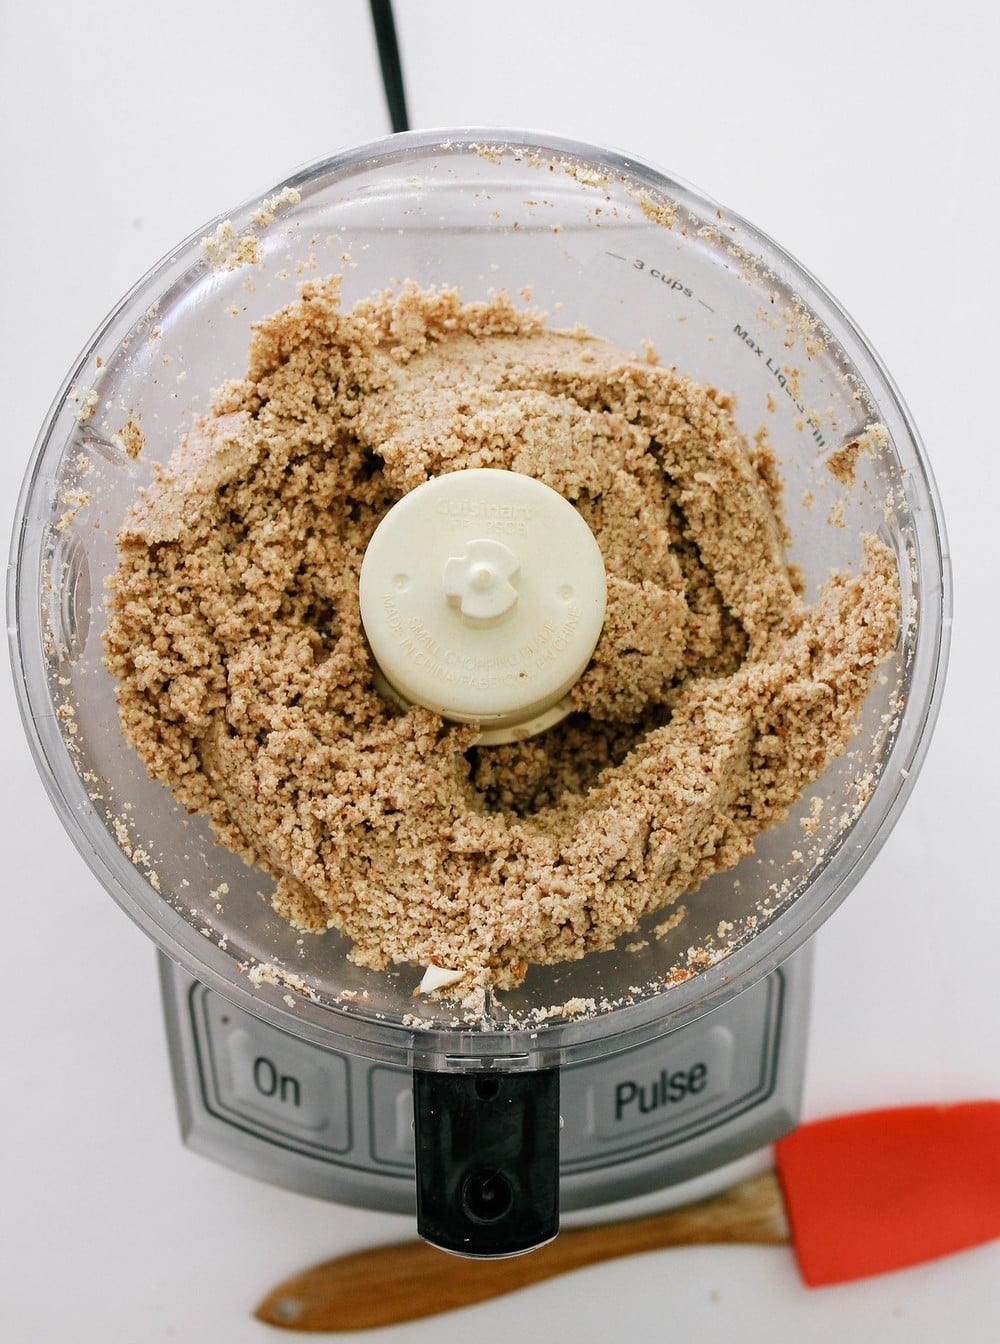
Above is a look after about 5 – 7 minutes as it starts to bind and clump.
Here, pictured above, we’re at about 10-12 minutes of processing the almonds. It’s starting to clump up at this point.
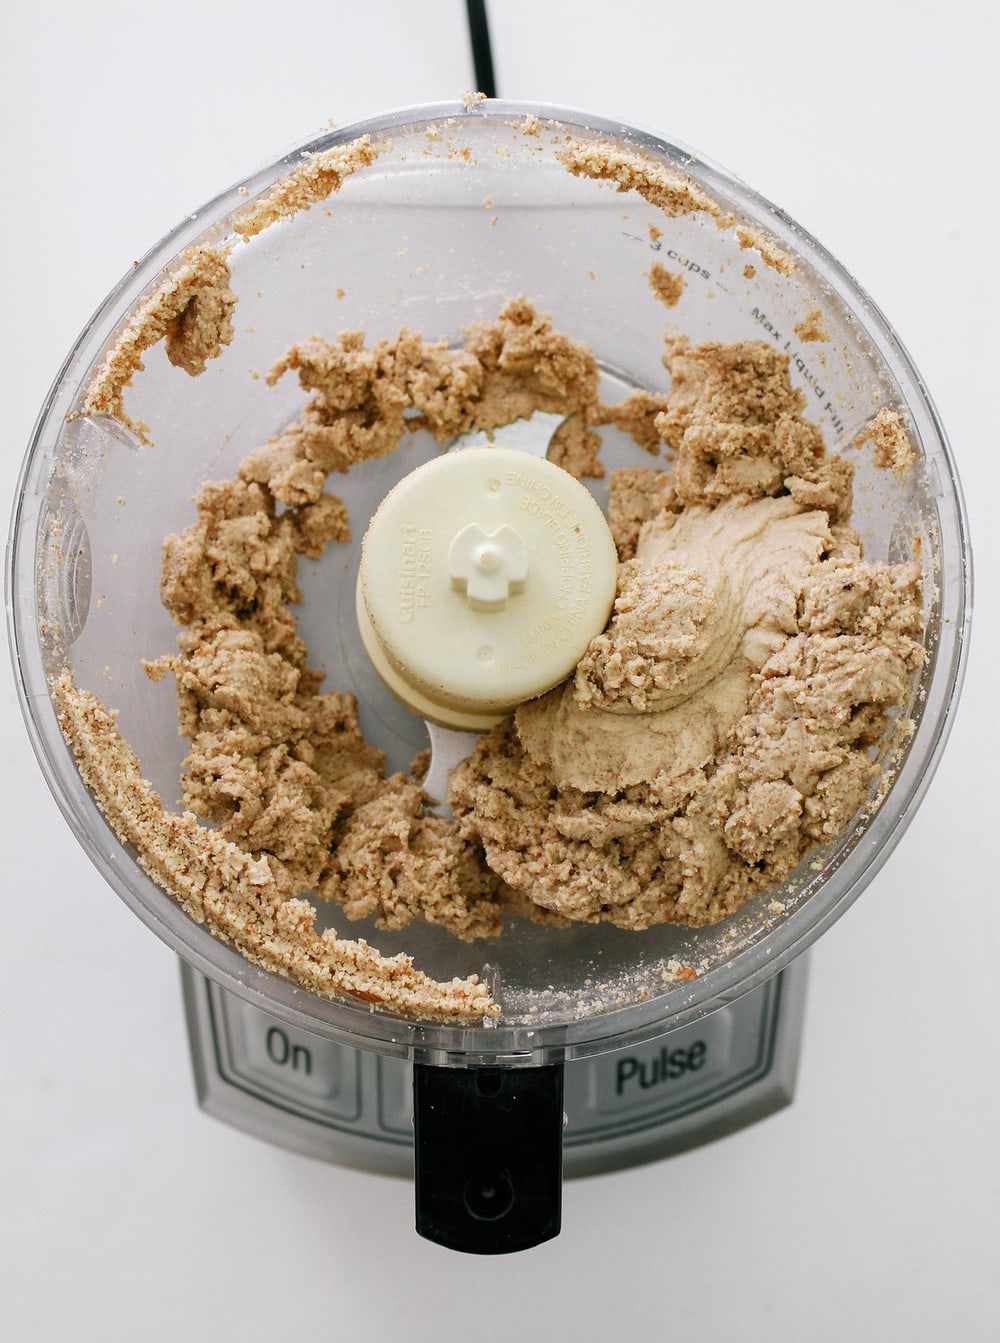
Now you see the almonds after 15 minutes of processing. They are starting to warm up, releasing their oils and creating a smoother consistency. It’s finally coming together.
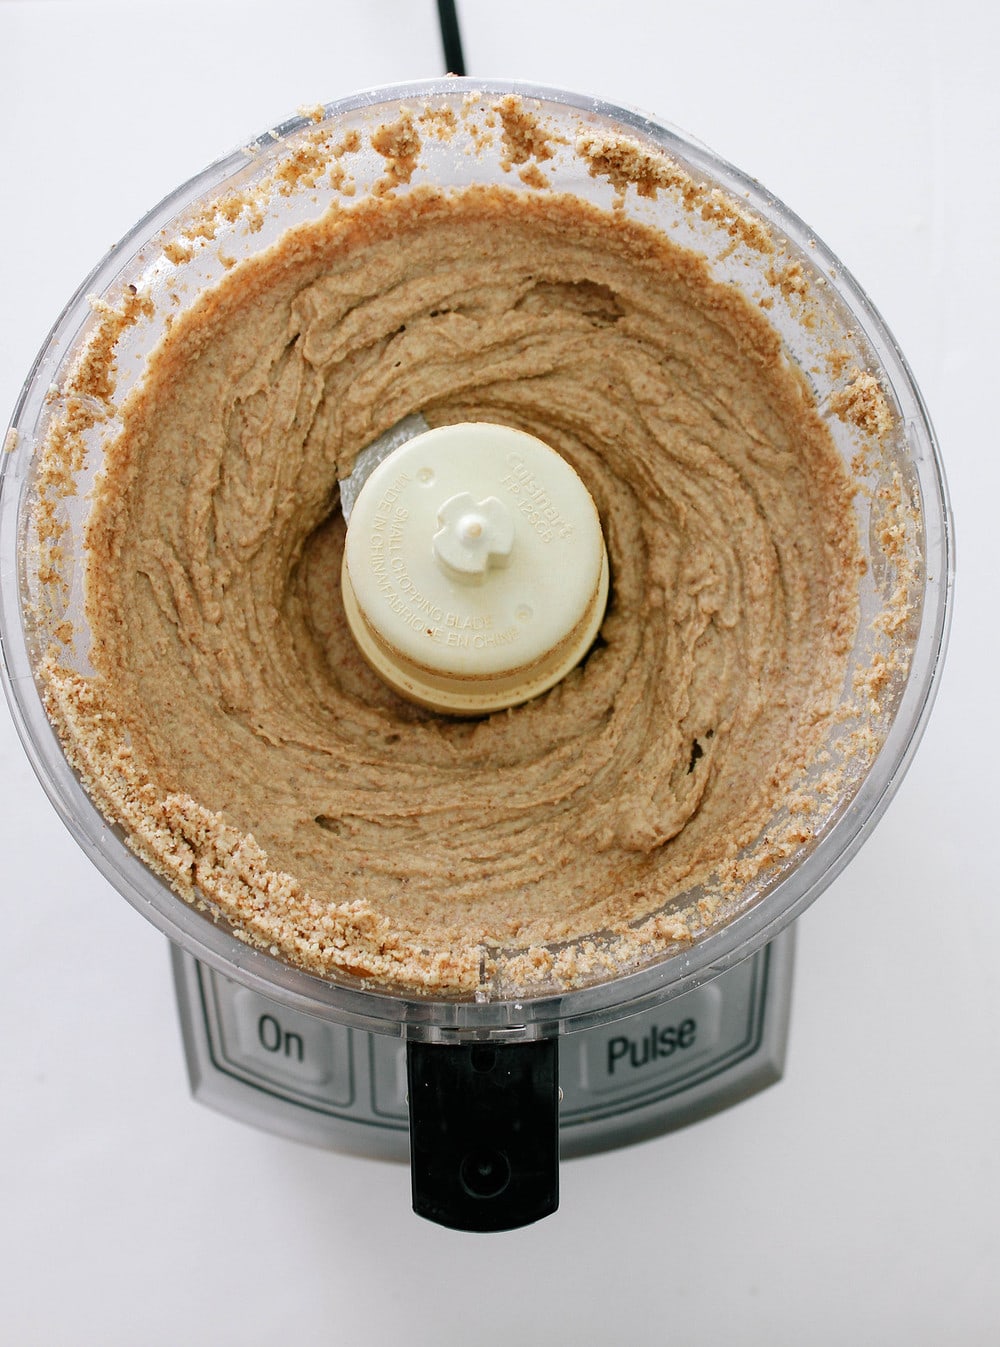
Below is after about 20 minutes. Your patience has paid off, and you now have a delicious homemade nut butter to use however you like!
Optional add-Ins
You can easily add flavor to your almond butter by adding any of these various ingredients to the almonds before blending.
- 2 tablespoons maple syrup
- 1/2 – 1 teaspoon vanilla extract or powder
- 1/4 cup cacao powder
- 1/2 – 1 teaspoon cinnamon
- 1 teaspoon pumpkin spice
How To Store
- Counter: Homemade nut butter can be stored in the pantry for up to 1 month.
- Refrigerator: For longer storage, almond butter can be kept in the refrigerator for 2 – 3 months, maybe more.
Serving Suggestions
Here are a few of my favorite ways to use this delicious, creamy condiment:
- Chocolate, Almond Butter Smoothie Bowl
- Supreme Black Bean Brownie Cups + Nut Butter Swirl
- Almond Butter Cookies (4 Ingredients)
- Almond-Lime Dressing
- or drizzled on Apple Nachos
- See all Almond Butter recipes on TSV!

I hope you loved this nut butter recipe! Leave a comment and rate it below. I love to hear what you think, or any changes you make.
HOMEMADE ALMOND BUTTER

Easy to make at home, this raw almond butter is a staple in my kitchen. Spread it on sandwiches, use it in nut butter dressing and so much more!
- Prep Time: 20 min
- Total Time: 20 minutes
- Yield: Makes 2 cups
- Category: Condiment
- Method: blender, food processor
- Cuisine: American
- Diet: Vegan
Ingredients
- 1 pound (16 oz) almonds (raw or toasted), about 2 1/2 cups
optional add-ins
- 1/2 teaspoon or so of cinnamon
- 1 teaspoon vanilla extract or seeds of 1 vanilla bean
- 2 tablespoons pure maple syrup, warmed
Instructions
Add almonds to high-speed blender or food processor blend until creamy, stopping frequently to scrape down the sides as needed. If adding in extra ingredients, please do so after you have achieved a creamy consistency.
The total time from beginning to end may take 15 to 25 min, depending on your machine.
Makes 2 cups
Notes
To make sure you get that super creamy texture, just when you think you’re done…keep the blender going for another 5 minutes or so. I’ve stopped to soon and had a somewhat pasty batch, it wasn’t bad but the creamier it is the easier it is to spread.
Be sure if adding maple syrup it’s a little warm before adding. If you add cold maple syrup your mixture will seize up a bit and take longer to finish.
Roasted almonds will be fine too!
Enjoy and have fun experimenting with add-ins!
FOLLOW TSV on Facebook, Instagram, Pinterest, Youtube, Subscribe (email), or RSS for more recipes and inspiration!
How long does this raw almond butter keep in the fridge?
It will last a good couple weeks in the fridge. I eat it within a week and have never had it longer than that but I'm guessing a couple weeks will be ok, maybe more…
I'd love to try it, but I don't have a food processor of any sort, I only have the like .. hand blender .. I'm not sure what it's called, but I don't think it'll work on almonds .. :c
Oh my word!!!!, just came across your site and am droooooooling!!!! Am definitely gona try every recipe. This will be the first time I will be tasting almond butter as its not common to get here in south Africa. Probably cause almonds are quite expensive here. I can't wait. Oh, and definitely going to try every ice cream recipe u have posted. This is definitely a gals dream site
Great Raw Almond Butter Recipe! This is the first recipe I've read that actually explains that it takes time for the oil to release and make the butter creamy. My batches have always turned out pasty and now I know it's because I haven't been blending long enough. Thanks Sooo Much!!!
I'm so glad this recipe helped with that and I hope the rest of your batches turn out smooth and creamy! Cheers :)
Sorry but I tried this for 40 minutes and nothing happened. Do yo have a special food processor? I tried with both my food processor and my blender. I had to stop every few seconds to blend the almonds. I shacked the blender so many times. Still, no creamy texture. There is some slight change on the texture but it is closer to almond crumbs than butter. Unless everyone have extremely expensive and fancy food processors, I don't understand how everyone had such great success! My process is a pretty descent one (Cuisinart) and my blender is ok too (Oster). Any recommendations?
I'm sorry your having difficulty. I have the same equipment, a Cuisinart, and have been able to make this many times. I do see that it is starting to take a little longer and am wondering if maybe the blades are dulling. That may be the case with your experience. The only recommendation I can say is to maybe replace the blade, or purchase a blade specifically for this job (have an extra S blade). I think I will be having to try this too. My food processor is the work horse of the kitchen and gets used often. A blade just for nut butters may what is needed.
I would also suggest giving your processor a break and try blending again in a couple hours once the motor cools down. Hope you find this to be helpful. :)
Maybe it's just my cheap food processor's fault, but this took a very long time to get to anything resembling almond butter. Do you think soaking the nuts ahead of time would help with this or just water down the end product?
Soaking my do the trick. I've never soaked my nuts before making nut butters so I'm not sure how it will turn out but I imagine it won't be bad at all. I may try that on my next batch coming up and see if it helps move the process along any quicker. It can take a long time, even mine can take awhile. Let me now how your's goes and I'll do the same. :)
Thank you so much for this recipe. I have made almond butter before but the recipe I used called for oil. This is a better version thank you for sharing! I buy my almonds at Aldi's they are pretty cheap there.
For once, I can make this at home without buying a brand in stores. Nothing wrong with that but I'm been enjoying making the obvious vegan essentials in my kitchen. Thanks so much for this recipe!
Your so very welcome ! Thank you for taking a moment to share your thoughts. I love making my own too. It's really so easy and yummy. Enjoy your almond butter. Cheers :)
I just tried this and it's awesome. Thank you so much for sharing the recipe! :)(I had to do a few adjustments because I just have a hand blender. I added two smashed bananas and 1 1/2 teaspoon of agave syrup, for the mixture to blend properly. It worked!)
Your welcome ! I so glad you were able to make it work! Sounds interesting using the bananas and agave…must taste great. :)
It does :) Now, 2 days later, it started to get a bit darker because of the bananas, but that's it. It tastes the same. I'm dying to try other recipes you have here!
I was wondering how the banana's would hold up. I'm ready for another batch myself. I go through one jar a week. I just love it ! Let me know how the other recipes go for you as well. Have fun experimenting. :)
your pictures are making me almond butter hungry. I always seem to forget how easy it is to make almond butter…
Yes, easy it is. I just had some on sliced apples…so good!