Oat Jam Thumbprint Cookies
These Oat Jam Thumbprint Cookies are made with oat flour and rolled oats, berry jam, and sweetened with pure maple syrup for a healthy breakfast, snack or dessert!

Who doesn’t enjoy jammy cookies? Made with simple ingredients and lots of love, these vegan oat jam thumbprint cookies are a tasty little treat!
I wanted to create a healthy thumbprint cookie that was super easy to make, using ingredients you may already have in your pantry. I decided to use oat flour instead of almond flour to keep them low in fat and calories.
They turned out wonderful and make a perfect treat when you’re craving something sweet. Plus, they are kid-friendly and mother-approved!
So without further ado, let’s make cookies!
Ingredient Notes
Here is a list of everything you’ll need to make this recipe, plus a few ideas for ingredient substitutions.
- Oats – Old-fashioned oats can be used to make your own oat flour as noted in the recipe.
- Pure Maple Syrup – Substitute with coconut nectar or date syrup.
- 100% Fruit Jam – Use your favorite jam… I used a mixed berry jam and it was so good. These would be great with grape, cherry, boysenberry, even marmalade would be delicious!
- Oil – Either coconut or olive oil will work well. If you’d like to skip the oil, unsweetened applesauce is a great choice.
- Vanilla – Adds a nice layer of flavor, but if you don’t have it on hand the cookies will still be great.
- Cinnamon – This versatile warming spice compliments all jams and jellies.
- Baking Powder – If you don’t have baking powder on hand, use 1/4 teaspoon baking soda.
- Salt – I love pink (Himilayan) mineral salt because it contains essential minerals and trace elements that other salts don’t have. Feel free to use your favorite.
How To Make Thumbprint Cookies
- Preheat the oven to 350 degrees.
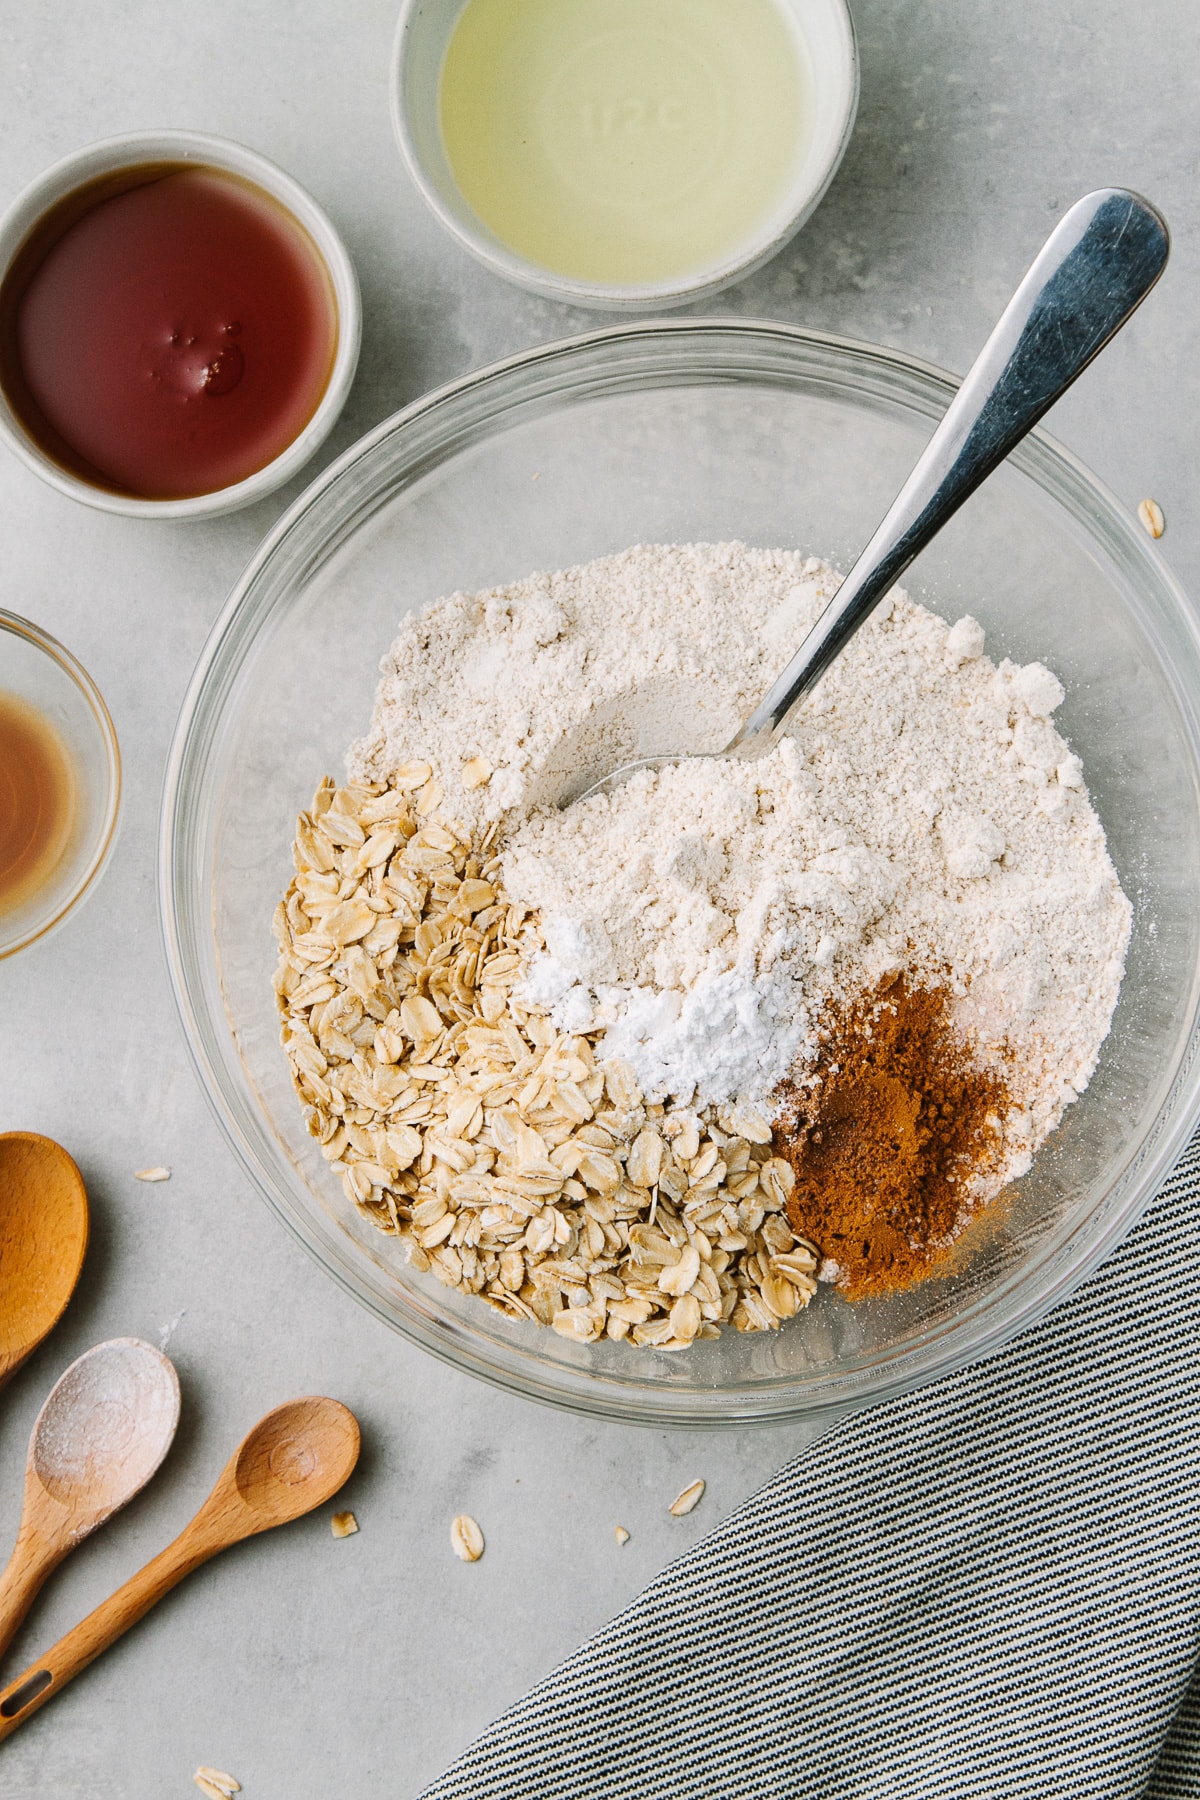
- Whisk together the oat flour, oats, baking powder, cinnamon, and salt in a medium-sized bowl. Add the oil, maple syrup, and vanilla, and mix until well combined.
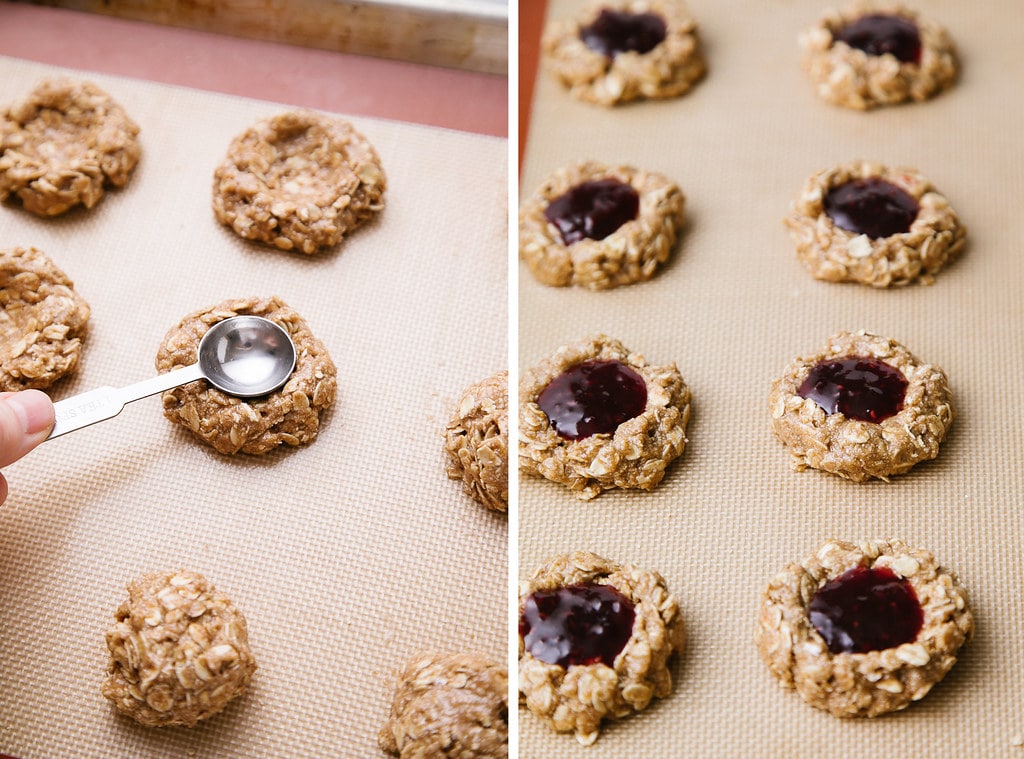
- Scoop up rounded tablespoons of the dough and shape it into a ball, they will be moist, so do the best you can.
- Place on the cookie sheet and using the back of a teaspoon or your finger, press down the center.
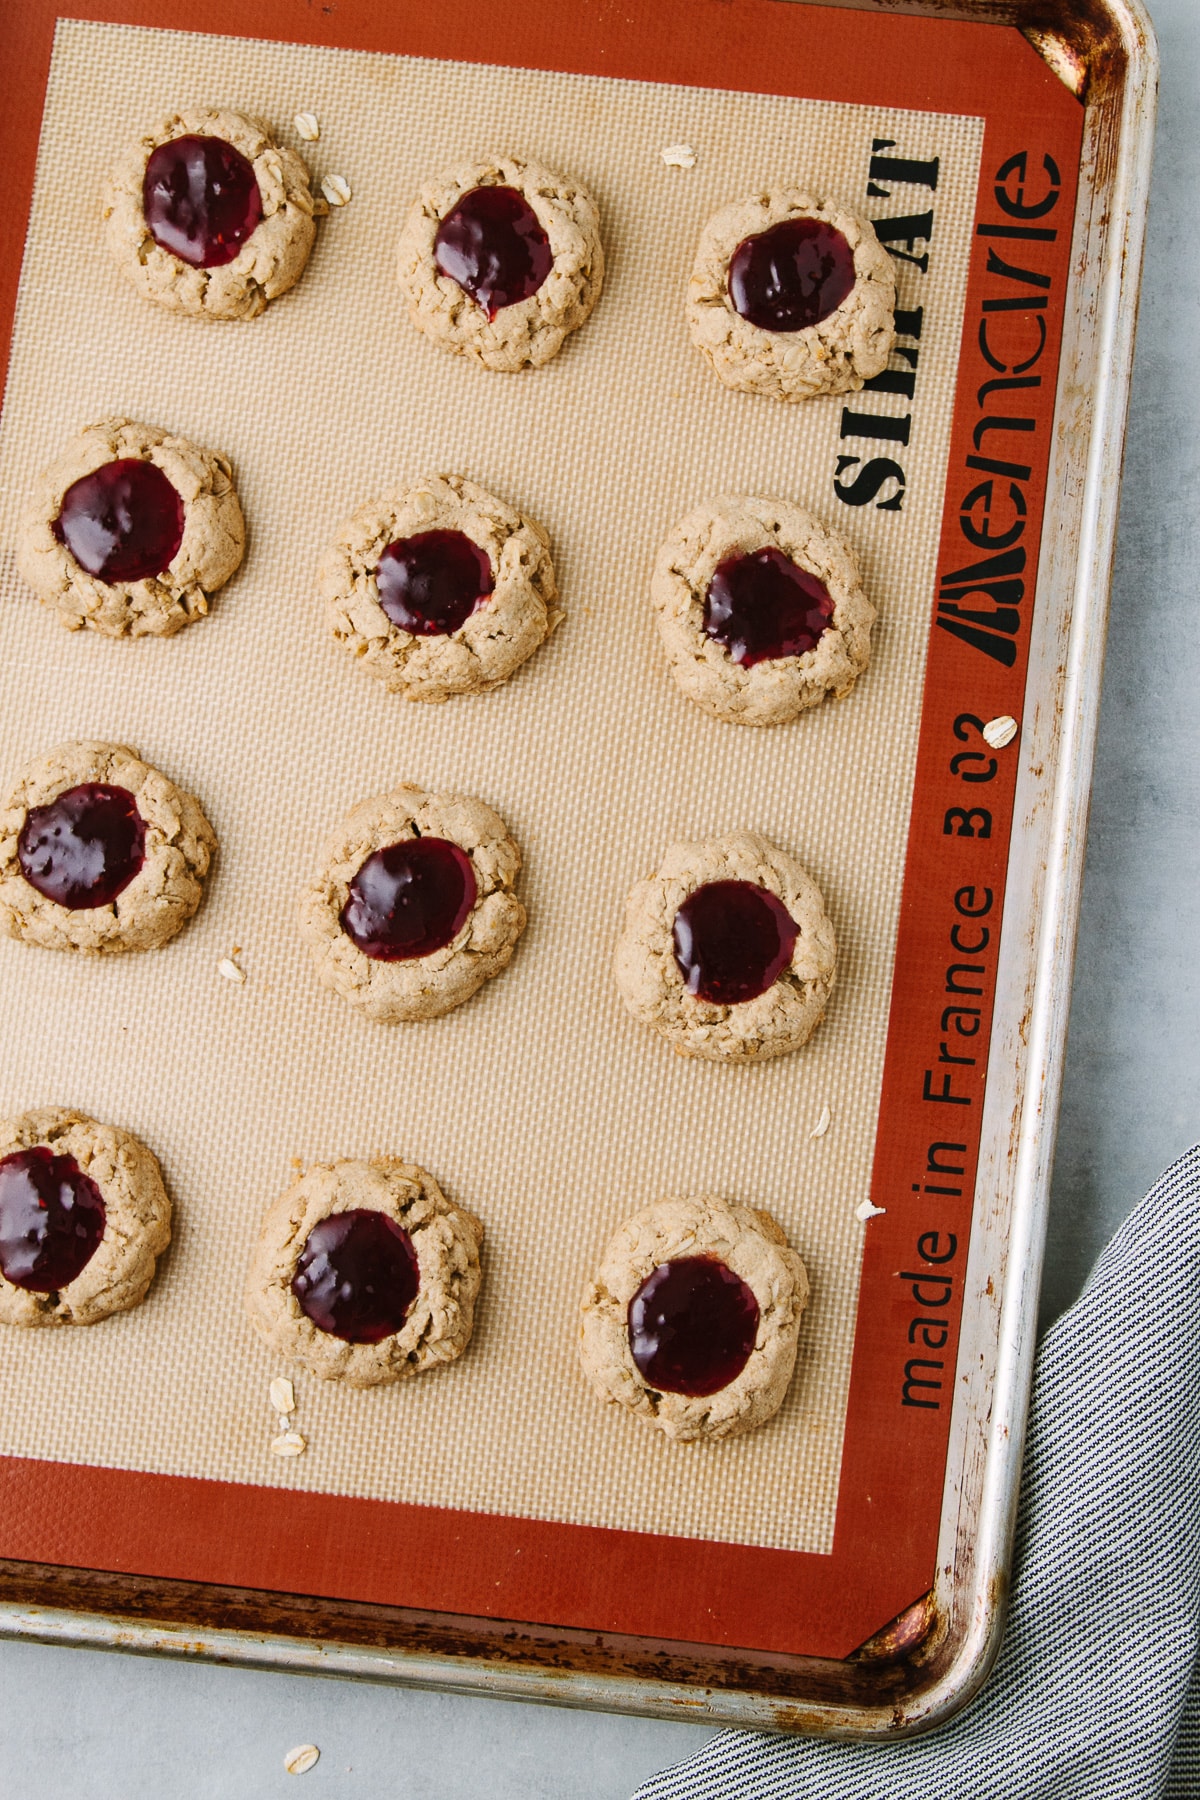
- Fill each hole with 1 teaspoon of jam.
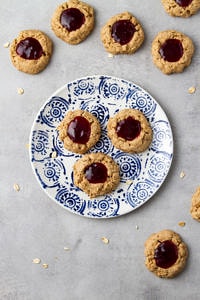
- Bake for about 10 – 13 minutes. Once done, let them cool for a few minutes and enjoy!
How To Store
Counter: Cookies can be stored on the counter in a covered container for up to 5 days.
Refrigerator: To keep a little longer, keep them in the refrigerator for up to 10 days.
Freezer: Thumbprint cookies are freezer-friendly for up to 2 months. To freeze, let them cool completely and store them in freezer-safe containers.
More Cookies Recipes!
- Vegan Snickerdoodles
- 1 Bowl Vegan Peanut Butter Cookies
- Peanut Butter & Chocolate No-Bake Cookies
- Cranberry Pistachio Oatmeal Energy Bits
- Vegan Chocolate Chip Cookies
- Almond Flour Thumbprint Cookies
If you try this vegan thumbprint cookie recipe, please let me know! Leave a comment and rate it below. I love to hear what you think, or any changes you make.
OAT JAM THUMBPRINT COOKIES
Simple, festive and easy to make, these gluten-free thumbprint cookies will be a loved by the whole family!
- Prep Time: 15 min
- Cook Time: 15 min
- Total Time: 30 minutes
- Yield: Makes 12 cookies
- Category: Dessert
- Method: Bake
- Cuisine: Vegan, American, Gluten Free
Ingredients
- 1 1/2 cups oat flour (see notes)
- 1/2 cup rolled oats
- 1 teaspoon cinnamon
- 1 teaspoon baking powder
- pinch of mineral salt
- 1/4 cup pure maple syrup
- 1/4 cup olive or coconut oil (in it’s melted state) or applesauce
- 2 tablespoons almond butter, optional
- 1 teaspoon vanilla extract
- triple berry chia jam or 100% fruit jam, for filling
Instructions
Preheat oven to 350 degrees. Lined a baking sheet with parchment paper or silicone mat.
Mix: In a medium sized bowl combine the flour, oats, cinnamon, baking powder and salt. Add coconut oil, maple syrup and vanilla, blend until it comes together and forms a ball.
Roll & Flatten: Scoop 1 rounded tablespoons of the dough and shape into a ball. The dough will be moist so just do the best you can. You can also shape the mound on the cookie sheet. Using the bake of a rounded teaspoon, make an impression in the middle of each cookie. If edges crack a bit, press it together gently.
Add Jam: Add one teaspoon of fruit jam/filling into each dent.
Bake: Place in the oven, on the center rack, and bake for 10 -13 minutes, rotating the baking sheet once. Remove from oven, let cool a few minutes.
Makes 12 cookies
Notes
How To Make Oat Flour: You can easily make your own oat flour at home in a blender. My favorite blender for small jobs like this is the NutriBullet. Simply add 1 1/2 cups of old fashioned oats to the cup of your blender and process until it turns to flour, about 1 minute or so. Feel the flour between you fingers, it should be very fine.
If you don’t have applesauce on hand or want to make these oil-free, use another 1/4 cup of pure maple syrup.
Store: Keep cookies stored in an air-tight container on the counter for 5 days. To keep longer, store in the refrigerator for up to 10 days. They also freeze well for up to 2 months in freezer safe containers (store with parchment paper between the cookies so they don’t stick together).
Follow TSV on Facebook / Instagram / Pinterest / RSS for more inspiration!
I was amazed at how fast and easy these were to make! I’ve always loved thumbprint cookies and wanted to make a healthier version. These turned out perfect!
EASY – My 13 year old had a blast making these and using the jam we bought on a trip to Oregon. YUM!
I made these for the family I work for (they’re dairy free) and their 1-year-old LOVED them! She kept saying “nummy!” as she was eating it. I thought she’d only eat the jelly off the top (and she did start off that way lol!) but she ate the whole cookie! We made the recipe exactly as listed WITH the almond butter, and using unrefined coconut oil actually gave it a delicious light coconut flavor that went so well with the oats, cinnamon, and raspberry jam that we used. These cookies will definitely be going into our snack rotation!
Just made your recipe for the thumb print cookies and they are so delicious!! I did have some doubt’s when I saw how loose the batter was but to my surprise they held up very good after baking about 15 mins. Superb!! Thank you!
Hi, just wondering since my 9 year old will be making these, would using a mini muffin pan be helpful in order to hold the shape better? If so would that change the bake time?
They will hold their shape, so no need to use a muffin pan unless you just want to. I’ve never made them using a muffin tin, but the cooking time should be about the same (assuming the cookie size is the same). I hope that helps, and she has fun making the thumbprint cookies!