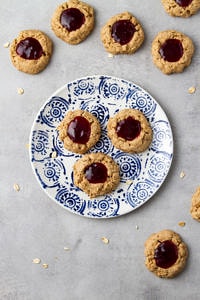
Oat Jam Thumbprint Cookies
These Oat Jam Thumbprint Cookies are made with oat flour and rolled oats, berry jam, and sweetened with pure maple syrup for a healthy breakfast, snack or dessert!

Who doesn’t enjoy jammy cookies? Made with simple ingredients and lots of love, these vegan oat jam thumbprint cookies are a tasty little treat!
I wanted to create a healthy thumbprint cookie that was super easy to make, using ingredients you may already have in your pantry. I decided to use oat flour instead of almond flour to keep them low in fat and calories.
They turned out wonderful and make a perfect treat when you’re craving something sweet. Plus, they are kid-friendly and mother-approved!
So without further ado, let’s make cookies!
Ingredient Notes
Here is a list of everything you’ll need to make this recipe, plus a few ideas for ingredient substitutions.
- Oats – Old-fashioned oats can be used to make your own oat flour as noted in the recipe.
- Pure Maple Syrup – Substitute with coconut nectar or date syrup.
- 100% Fruit Jam – Use your favorite jam… I used a mixed berry jam and it was so good. These would be great with grape, cherry, boysenberry, even marmalade would be delicious!
- Oil – Either coconut or olive oil will work well. If you’d like to skip the oil, unsweetened applesauce is a great choice.
- Vanilla – Adds a nice layer of flavor, but if you don’t have it on hand the cookies will still be great.
- Cinnamon – This versatile warming spice compliments all jams and jellies.
- Baking Powder – If you don’t have baking powder on hand, use 1/4 teaspoon baking soda.
- Salt – I love pink (Himilayan) mineral salt because it contains essential minerals and trace elements that other salts don’t have. Feel free to use your favorite.
How To Make Thumbprint Cookies
- Preheat the oven to 350 degrees.
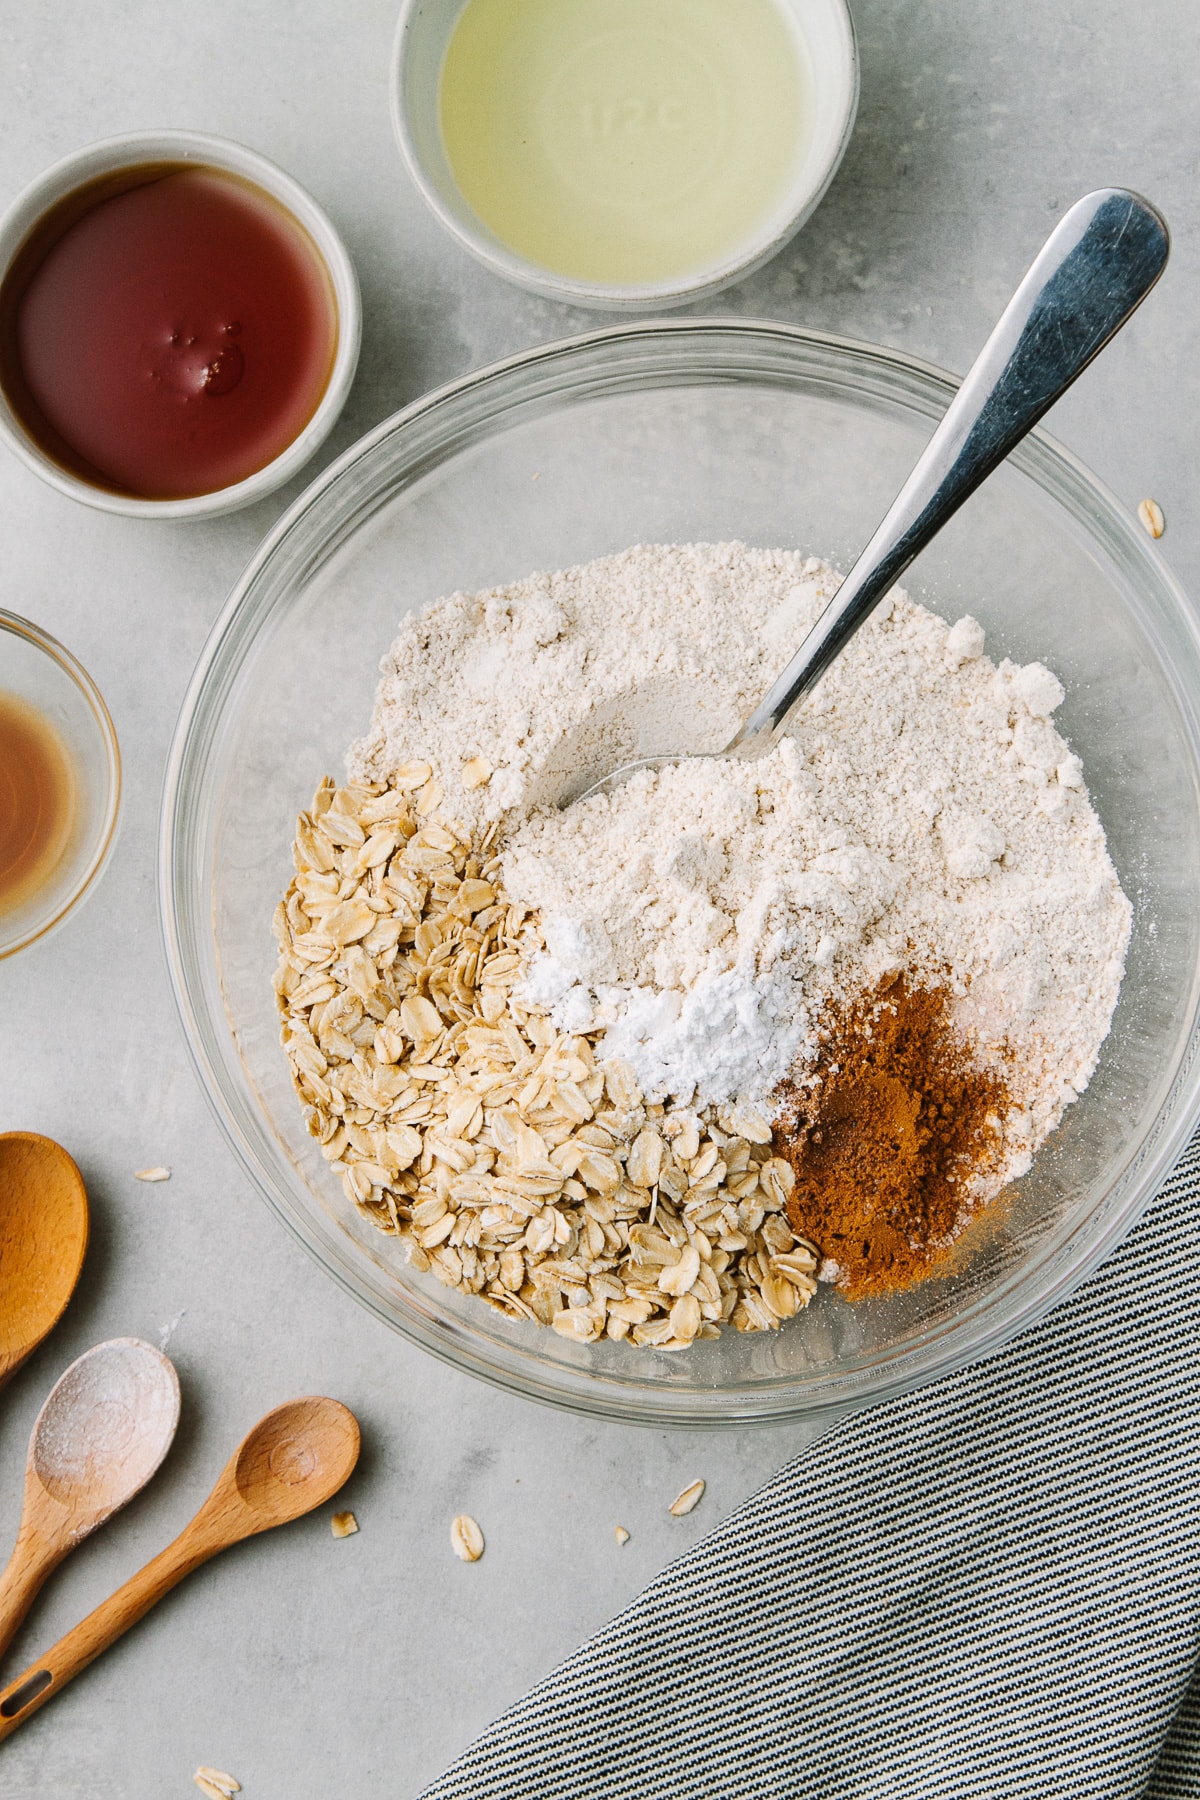
- Whisk together the oat flour, oats, baking powder, cinnamon, and salt in a medium-sized bowl. Add the oil, maple syrup, and vanilla, and mix until well combined.
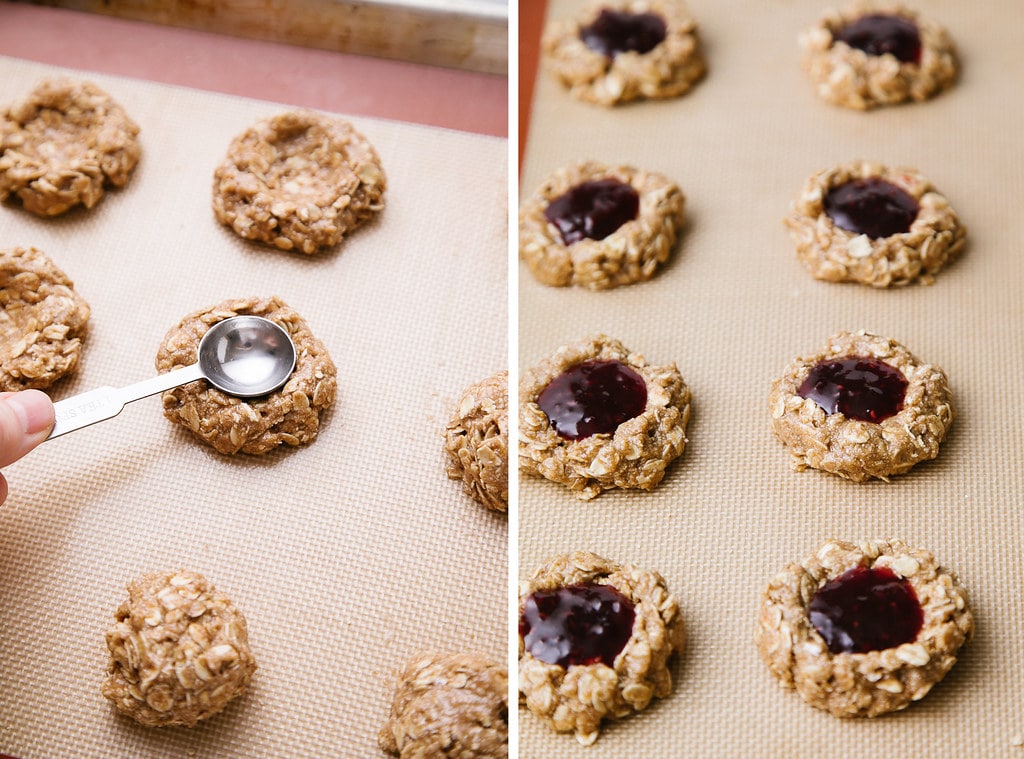
- Scoop up rounded tablespoons of the dough and shape it into a ball, they will be moist, so do the best you can.
- Place on the cookie sheet and using the back of a teaspoon or your finger, press down the center.
- Fill each hole with 1 teaspoon of jam.
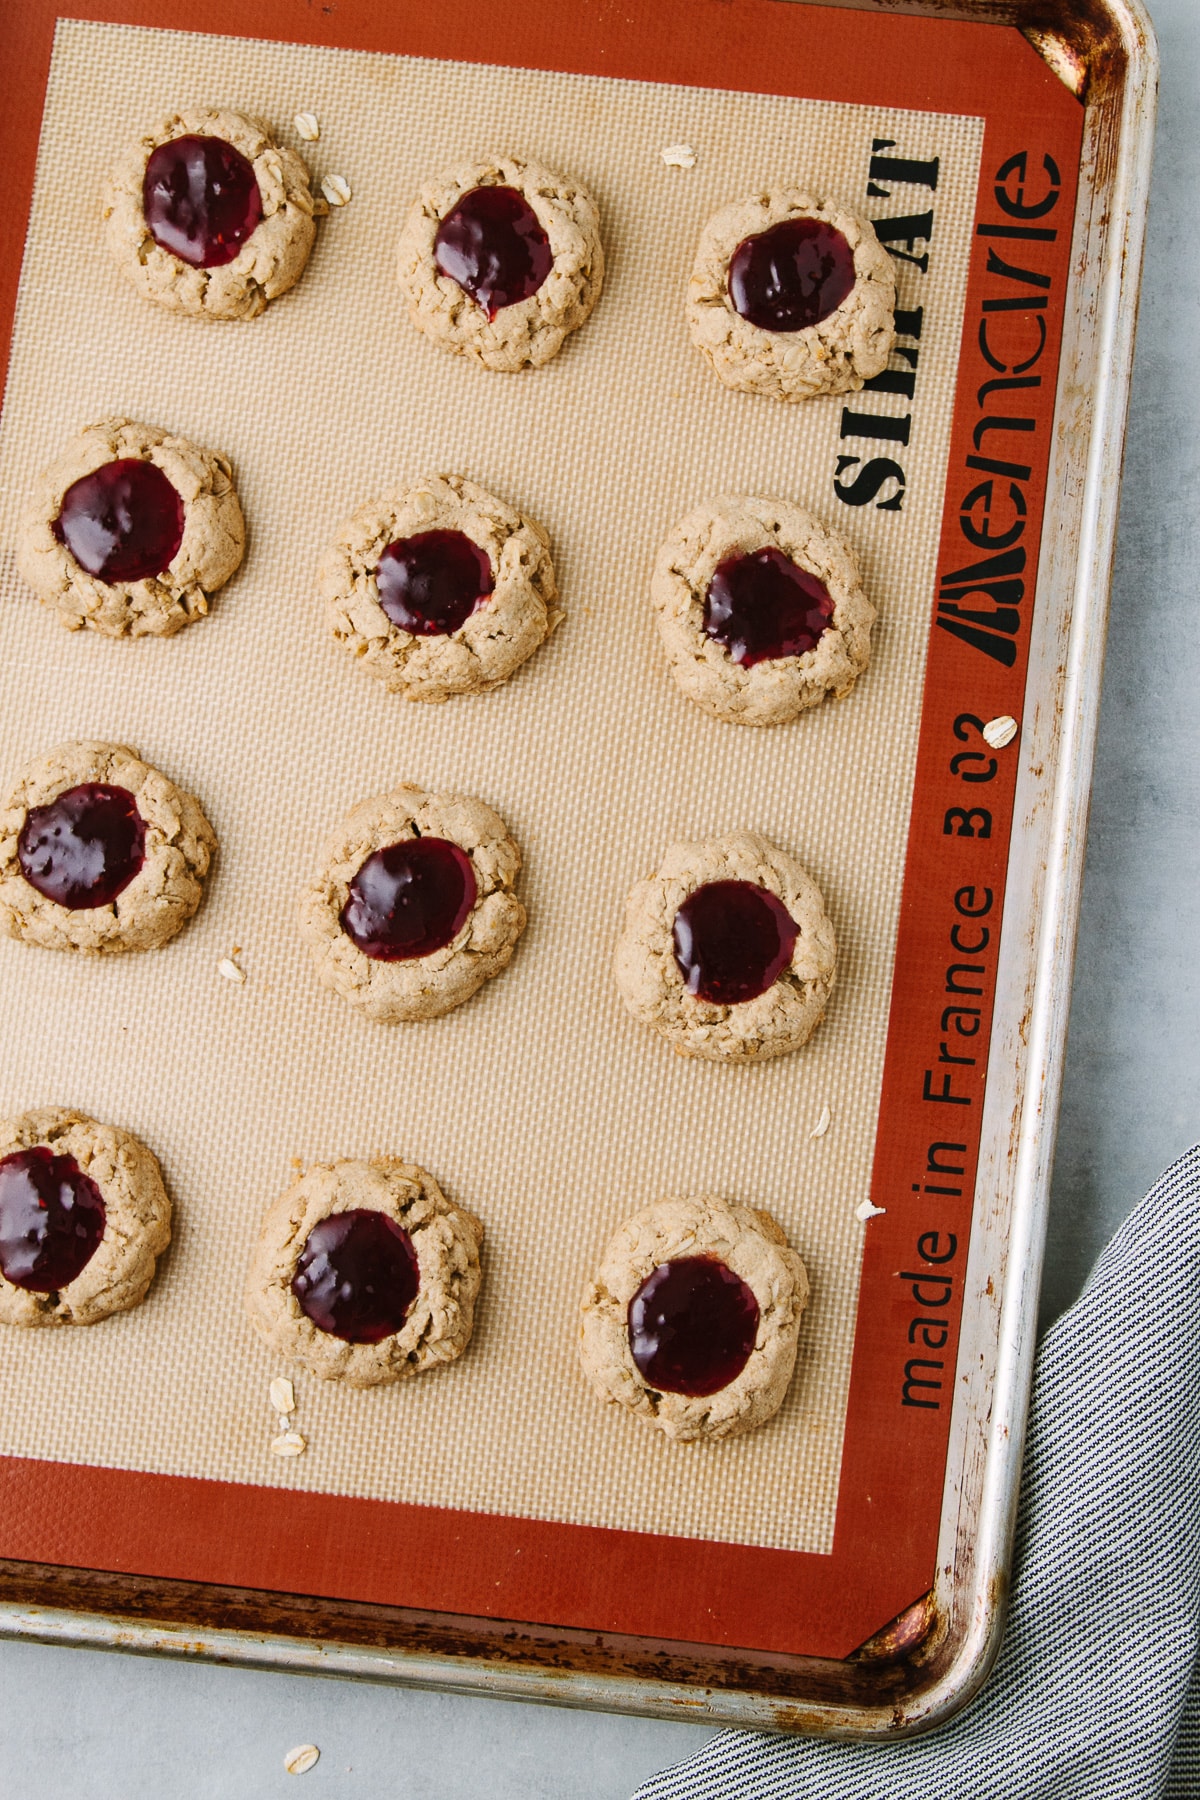
- Bake for about 10 – 13 minutes. Once done, let them cool for a few minutes and enjoy!
How To Store
Counter: Cookies can be stored on the counter in a covered container for up to 5 days.
Refrigerator: To keep a little longer, keep them in the refrigerator for up to 10 days.
Freezer: Thumbprint cookies are freezer-friendly for up to 2 months. To freeze, let them cool completely and store them in freezer-safe containers.
More Cookies Recipes!
- Vegan Snickerdoodles
- 1 Bowl Vegan Peanut Butter Cookies
- Peanut Butter & Chocolate No-Bake Cookies
- Cranberry Pistachio Oatmeal Energy Bits
- Vegan Chocolate Chip Cookies
- Almond Flour Thumbprint Cookies
If you try this vegan thumbprint cookie recipe, please let me know! Leave a comment and rate it below. I love to hear what you think, or any changes you make.
OAT JAM THUMBPRINT COOKIES
Simple, festive and easy to make, these gluten-free thumbprint cookies will be a loved by the whole family!
- Prep Time: 15 min
- Cook Time: 15 min
- Total Time: 30 minutes
- Yield: Makes 12 cookies 1x
- Category: Dessert
- Method: Bake
- Cuisine: Vegan, American, Gluten Free
Ingredients
- 1 1/2 cups oat flour (see notes)
- 1/2 cup rolled oats
- 1 teaspoon cinnamon
- 1 teaspoon baking powder
- pinch of mineral salt
- 1/4 cup pure maple syrup
- 1/4 cup olive or coconut oil (in it’s melted state) or applesauce
- 2 tablespoons almond butter, optional
- 1 teaspoon vanilla extract
- triple berry chia jam or 100% fruit jam, for filling
Instructions
Preheat oven to 350 degrees. Lined a baking sheet with parchment paper or silicone mat.
Mix: In a medium sized bowl combine the flour, oats, cinnamon, baking powder and salt. Add coconut oil, maple syrup and vanilla, blend until it comes together and forms a ball.
Roll & Flatten: Scoop 1 rounded tablespoons of the dough and shape into a ball. The dough will be moist so just do the best you can. You can also shape the mound on the cookie sheet. Using the bake of a rounded teaspoon, make an impression in the middle of each cookie. If edges crack a bit, press it together gently.
Add Jam: Add one teaspoon of fruit jam/filling into each dent.
Bake: Place in the oven, on the center rack, and bake for 10 -13 minutes, rotating the baking sheet once. Remove from oven, let cool a few minutes.
Makes 12 cookies
Notes
How To Make Oat Flour: You can easily make your own oat flour at home in a blender. My favorite blender for small jobs like this is the NutriBullet. Simply add 1 1/2 cups of old fashioned oats to the cup of your blender and process until it turns to flour, about 1 minute or so. Feel the flour between you fingers, it should be very fine.
If you don’t have applesauce on hand or want to make these oil-free, use another 1/4 cup of pure maple syrup.
Store: Keep cookies stored in an air-tight container on the counter for 5 days. To keep longer, store in the refrigerator for up to 10 days. They also freeze well for up to 2 months in freezer safe containers (store with parchment paper between the cookies so they don’t stick together).
Follow TSV on Facebook / Instagram / Pinterest / RSS for more inspiration!
These cookies are so good! I decided to blend half a banana with a little oat milk and just added a splash of maple syrup (measured out the same as the maple syrup), instead of doing only maple syrup. Thanks for the recipe, I recently made homemade jam and was looking to add it to cookies!
I’ve made this twice, Twas great
Made this today… Yummy and sooo easy!!! Next will try out the almond one :)
Thank for sharing, Dewina! I know you’ll love the others as well – so good! Cheers :)
Absolutely delicious, and so simple to make. Thank you!
U mentioned maple syrup in directions but not in ingradients list. ??
Oops, that’s should be sugar, not maple syrup. I’ve fixed the instructions. Thank you for bringing that to my attention!
My cookies spread out like pancakes. Not sure what went wrong – I followed the recipe precisely. I wasn’t sure if I was supposed to use baking soda or baking powder – ingredient list says soda, recipe then refers to powder….?
I just made these again… and ate 4 before stashing the rest away for my guy! ;)
If someone is making these for the first time, there are two things that I did differently that really helped. First is actually using a food processor and not a blender. Second is to heat up the coconut oil so that it isn't semi-solid. I had a really hard time evenly mixing it the first time because the coconut oil was just at room temperature.
Man, these are soooooo good!
Hi Shanti! So glad you liked these. Great points, especially on the coconut oil…I don't know why I didn't put that in too…will do now! Best for the coconut oil to be melted or in the oil state if the temperatures are hot enough. Thanks the fyi and enjoy your cookies! :)
They looks really delicious, I did not have a thumbprint cookie for so long! My grandma used to make some to my sister and I when we were little !! I will try your version right after my afternoon exam :) !!! xxxx
Grandma and her cookies…we all have great stories about those. Hope your exam went well, I know your almost at the end. Enjoy the cookies Lysa :)
I love your gorgeous photos of these! So glad you liked them! Great idea to add almond butter to these–I'll have to try that next time.
I'm so glad to have found your blog–I'm trying to explore more vegan baking and cooking and yours looks like the perfect site to help me do that! :)
Erika, these are great little gems. I really like your idea of using almond milk with the chia or flax instead of the usual water, which would be fine too but the milk is a great idea!
Thanks for the recipe and happy vegan eating. :)
This looks delicious! Does the optional nut butter make a big difference? Thanks! :)
I did it both ways and it's not a huge difference, just a subtle flavor enhancement with the almond butter. If you use another type of nut butter it may have a stronger presence.
I also tried it both ways with adding the chia seeds and one with the flax seed meal. I tried the chia without the nut butter…I love the texture of this one. I tried the flax with the nut butter and I liked that one as well. I think my fav will be to add chia to either way of making it.
Lastly, they do soften and become moister a bit after being in the container…which I actually like. Maybe to avoid this if someone doesn't like it that way is to cover loosely.
Hope you get a chance to try these…they are really good, I've been enjoying them the last couple days. If you do, let me know how it went and/or what changes you made. :)