Artisan Bread (4 Ingredients)
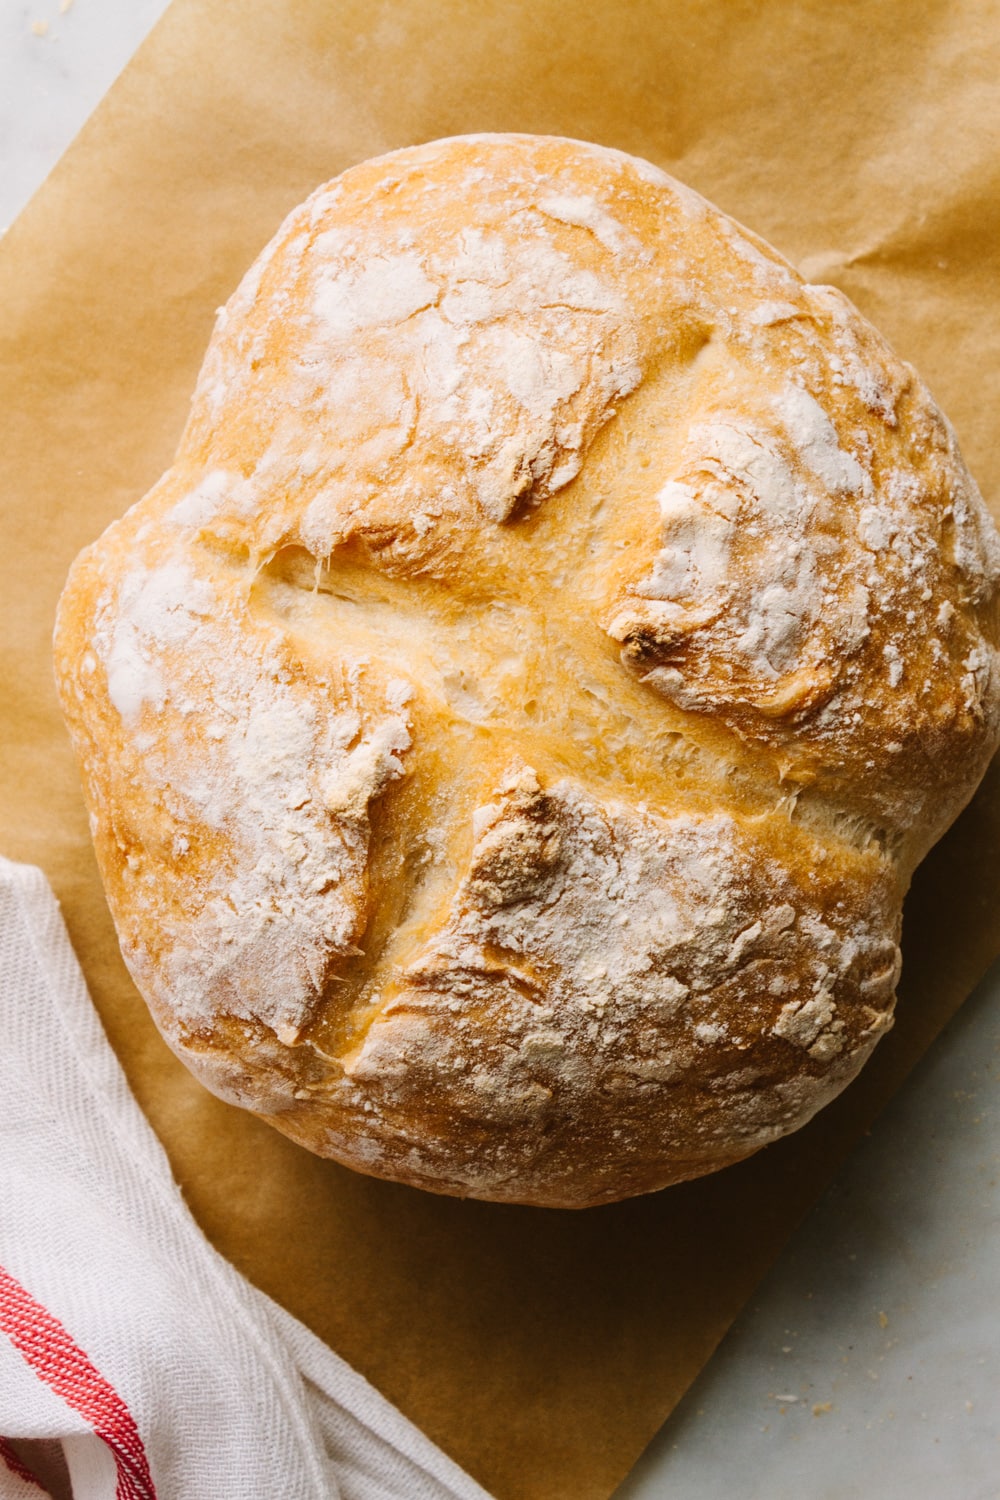
Homemade Artisan Bread is an easy no-knead recipe made with 4 ingredients and short rise, creating a delicious crusty bread with tender chew. Plus, it makes great pizza dough too!
There’s nothing better than fresh from the oven homemade bread, especially when it’s so easy to make and doesn’t require any fancy tools!
Why We Love This Recipe!
This no knead artisan bread comes together reasonably fast and results in a golden crispy crust with a soft, chewy crumb. It’s a perfect vegan yeast bread for sandwiches, toast, and bread bowls, and can even be used as a pizza crust!
Inspired by the book Artisan Bread in Five Minutes a Day (affiliate link), the premise is to make the master recipe which yields 4 loaves, and keep the dough in the refrigerator until ready to use for up to 14 days.
When ready, pull the dough out, let it rest, and bake your artisan bread while dinner is on the stove. And there you have it – only 5 minutes of hands-on (plus resting time) and a fresh homemade loaf of artisan bread.
Ingredient Notes
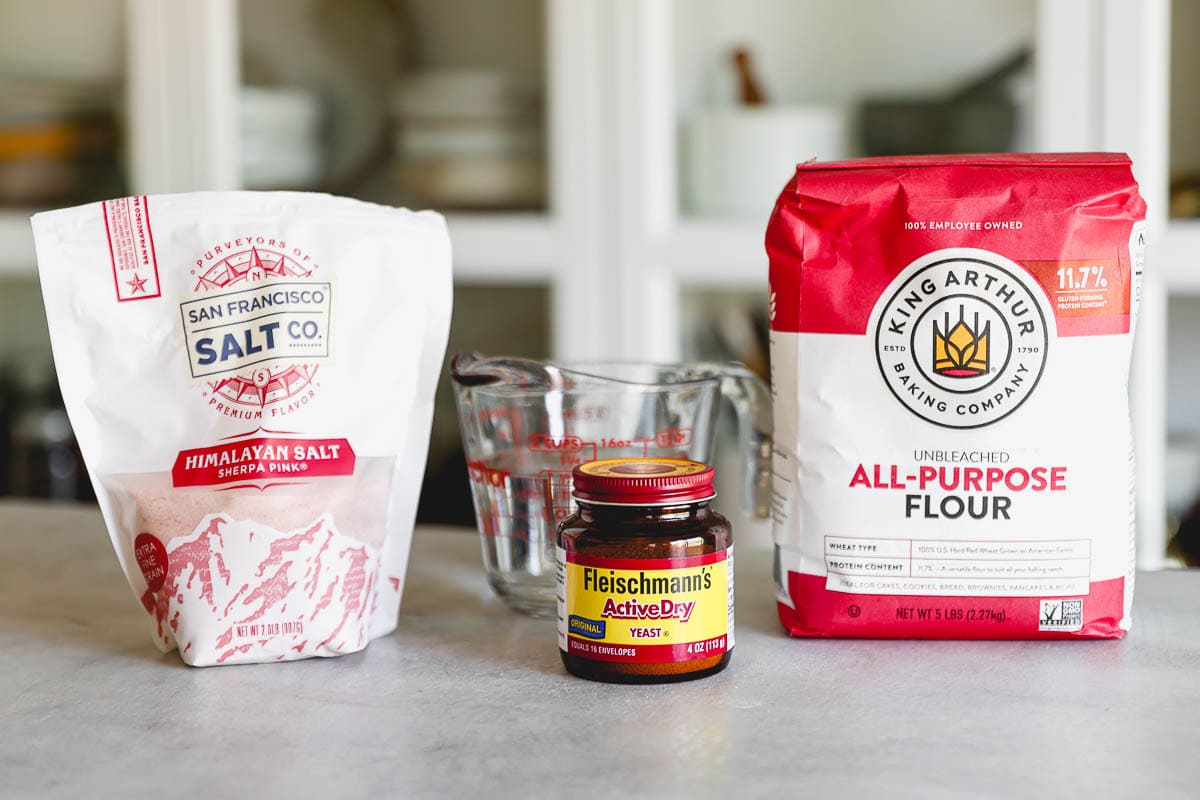
For this recipe, flour, yeast, water, and salt are combined and left to rise, then shaped and baked for a delicious, flavored homemade bread with no special tools required!
Here is everything you will need, plus substitution ideas:
- Flour: I used unbleached all-purpose flour for this recipe, but spelt, whole wheat, bread flour, or a mix will work great too. Just do not use self-rising, as these have added ingredients for rising. If you want to experiment with flour, here are two useful guides: Types of Flour, How to Buy, How to Store and Guide to Baking Flours.
- Water: Water should be lukewarm, anywhere between 70 – 100 degrees, and is what will activate the yeast. Any temperature higher or lower may adversely affect rising. For variation, replace the water with vegan buttermilk (for every 1 cup of plain unsweetened plant milk, use 1 tablespoon lemon juice or 1 teaspoon apple cider vinegar).
- Salt: I use mineral salt (himalayan), but any sea salt will work.
- Yeast: This recipe calls for instant or active dry yeast. Both can be used interchangeably without the need to ‘proof’ active dry yeast. Learn more about yeast.
- Optional add-ins: Add extra flavor by adding a small amount of fresh or dried herbs, spices, or other ingredients like sliced onions, garlic, sun-dried tomatoes, olives, etc.
Can I Make Artisan Bread Gluten-Free?
Yes! Artisan bread can be made GF using 1-to-1 gluten-free all-purpose flour (containing xanthan gum) with good results. If it doesn’t contain xanthan gum, add 1 1/2 teaspoons to the master recipe. Bread will form a hard crust and the center will be tender, but it may not brown or rise as much.
Adjusting Cups to Grams
For those baking using weight instead of cups, here is a handy guide King Arthur’s Ingredient Weight Chart. Simply use the search filter to find the flour you are using.
Equipment
No knead artisan bread can be made with just a few tools that almost every kitchen will have on hand!
- Baking vessel – You can make artisan bread using a skillet, shallow pan, dutch oven, pizza stone, or basically any oven-safe pot, pan, or baking dish.
- Large bowl – Used for making and letting the dough rise in. Can be glass, stainless steel, or plastic.
- Utensil – When combining the ingredients, you can use a wooden spoon or your fingers (my favorite way to mix).
- Small oven safe pot or rimmed baking sheet – Used to hold water on the lowest rack, allowing steam to build up during baking.
How To Make Artisan Bread
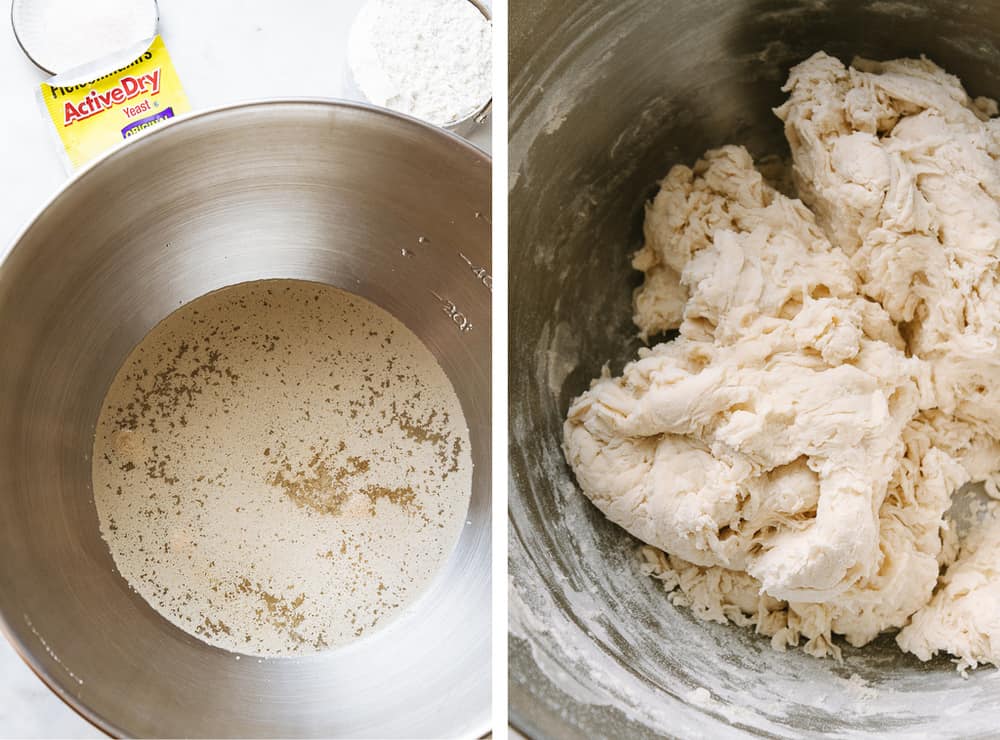
1. Make the dough
- In a large mixing bowl, combine the water, yeast, and salt, and stir to mix (shown above left).
- Add flour and mix (above right). The trick is to mix just until the flour is incorporated, with no kneading. The dough may be shaggy looking, but this is ok.
Tip: During rise time, the dough may double in size, so be sure to use a large enough bowl that will allow the dough to bloom and expand. The amount of dough shown here is half the master recipe.
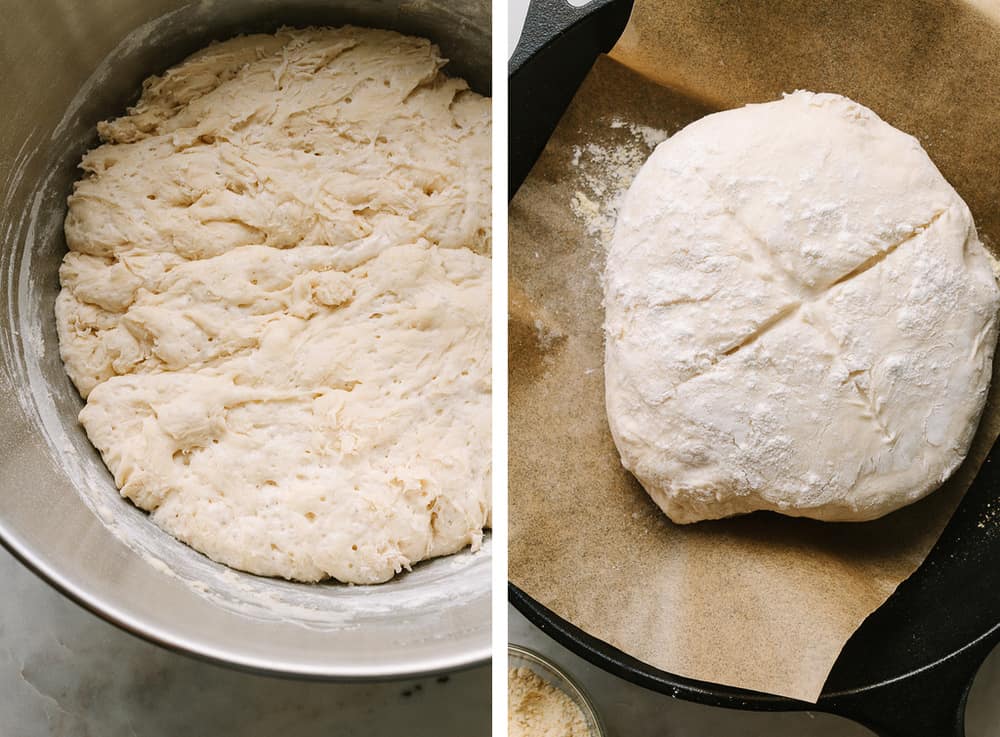
2. Let the dough rise
Cover the bowl with saran wrap (*this will create a humid environment in which yeast thrives) and let the dough rise for 2 hours in a warm, draft-free location. If you don’t have saran wrap, cover the bowl with a kitchen towel.
Tip: Ideal room temperature for proofing (rising yeast dough) is between 75 – 85 degrees F. Higher temperatures may kill the yeast and keep the dough from rising, while lower temperatures may slow the yeast activity, causing a longer rise time of 3 – 4 hours. Once done, the dough will have expanded in size, as shown above left.
3. Separate the dough
After the dough rises, if making the master recipe (which makes 4 loaves), pull away 1/4 of the dough and refrigerate the rest, tightly covered in a bowl, to bake later. Or make a larger loaf and use 1/2 of the master recipe. Note: I cut the master recipe in half and made two smaller loaves.
4. Prep dough for baking
- Lightly flour your hands and flat surface, and turn the dough out. It will be a little tacky.
- Place the dough on the floured flat surface, gently tuck the sides of the dough toward the bottom, rotating the dough until you get create a boule (roundish shape with a smooth surface).
- Let dough rise, uncovered until the oven is ready.
5. Score the top
Just before baking, sprinkle a little flour on top, and using a sharp knife, slash the top of the ball in an X shape (shown above right) or zigzag (this last step is optional but helps the bread expand when baking while also giving it a rustic look).
6. Preheat oven
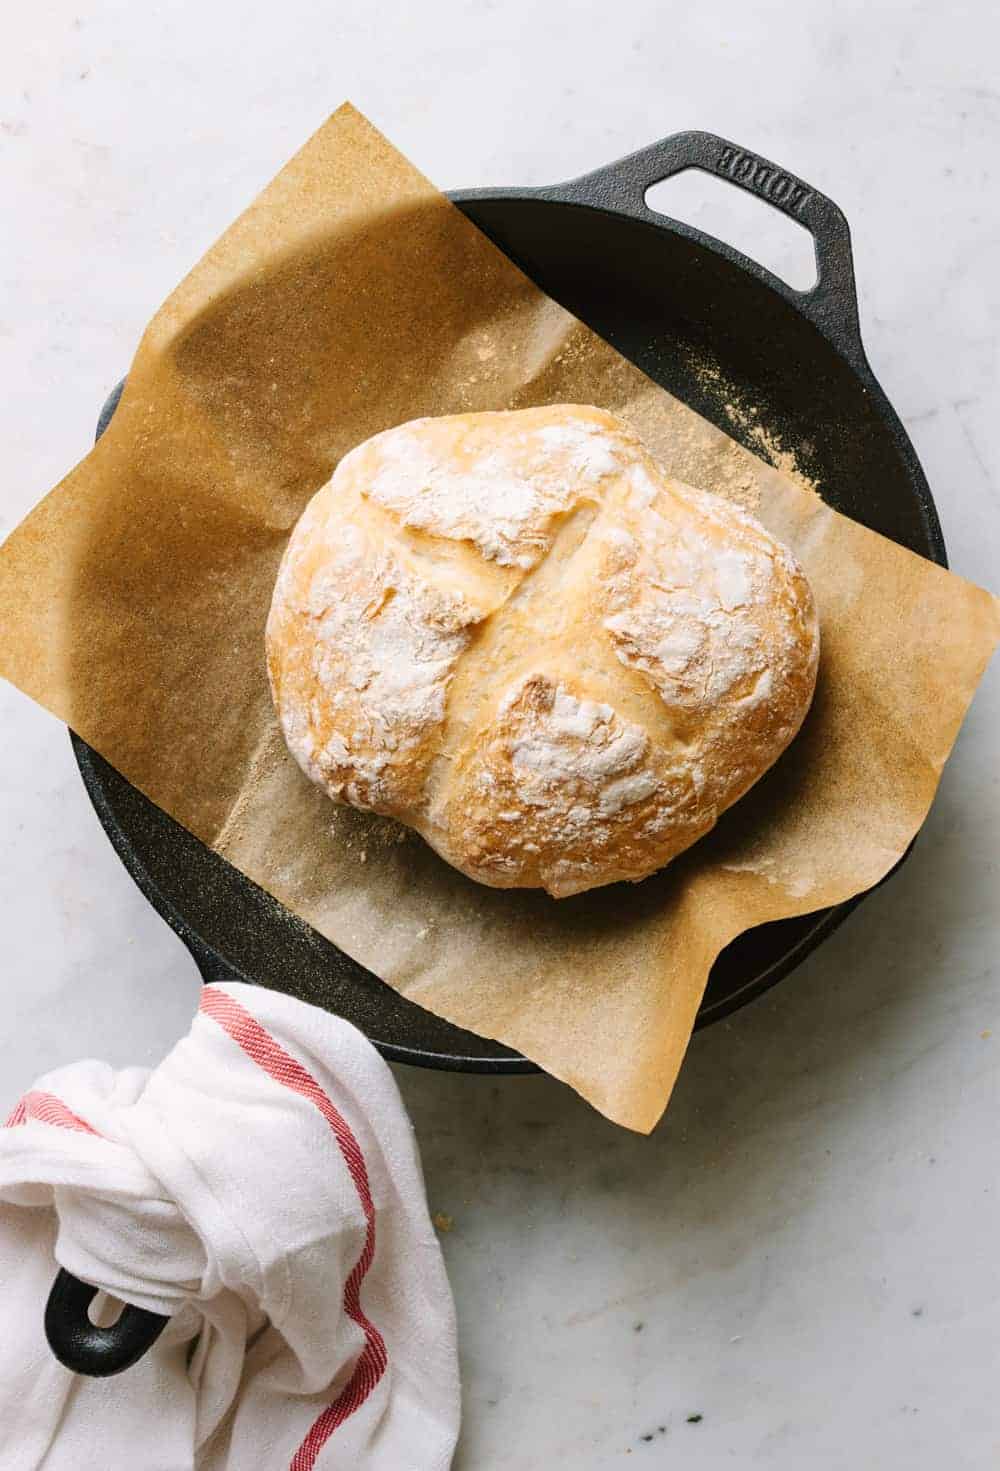
Preheat the oven to a steamy 450 degrees F, placing a cast iron skillet, pizza stone, or shallow fry pan in the oven to heat up (even a baking sheet will be fine). I find my bread looks best, color-wise, when the oven has been preheated for at least 30 minutes.
7. Bake the dough
- When ready to bake, place a rimmed cookie sheet or small pot with at least 1 cup of water on the bottom rack to steam (this will help the crust get nice and crispy, but it’s fine if you skip it).
- Line your baking vessel with parchment paper or lightly flour with cornmeal. Place prepped dough in the center of the baking vessel. Add the optional slash across the top, as mentioned above in step 5.
- Place on the center rack in the oven and bake for 30 – 40 minutes.
- Carefully remove from oven, let cool a few minutes and enjoy!
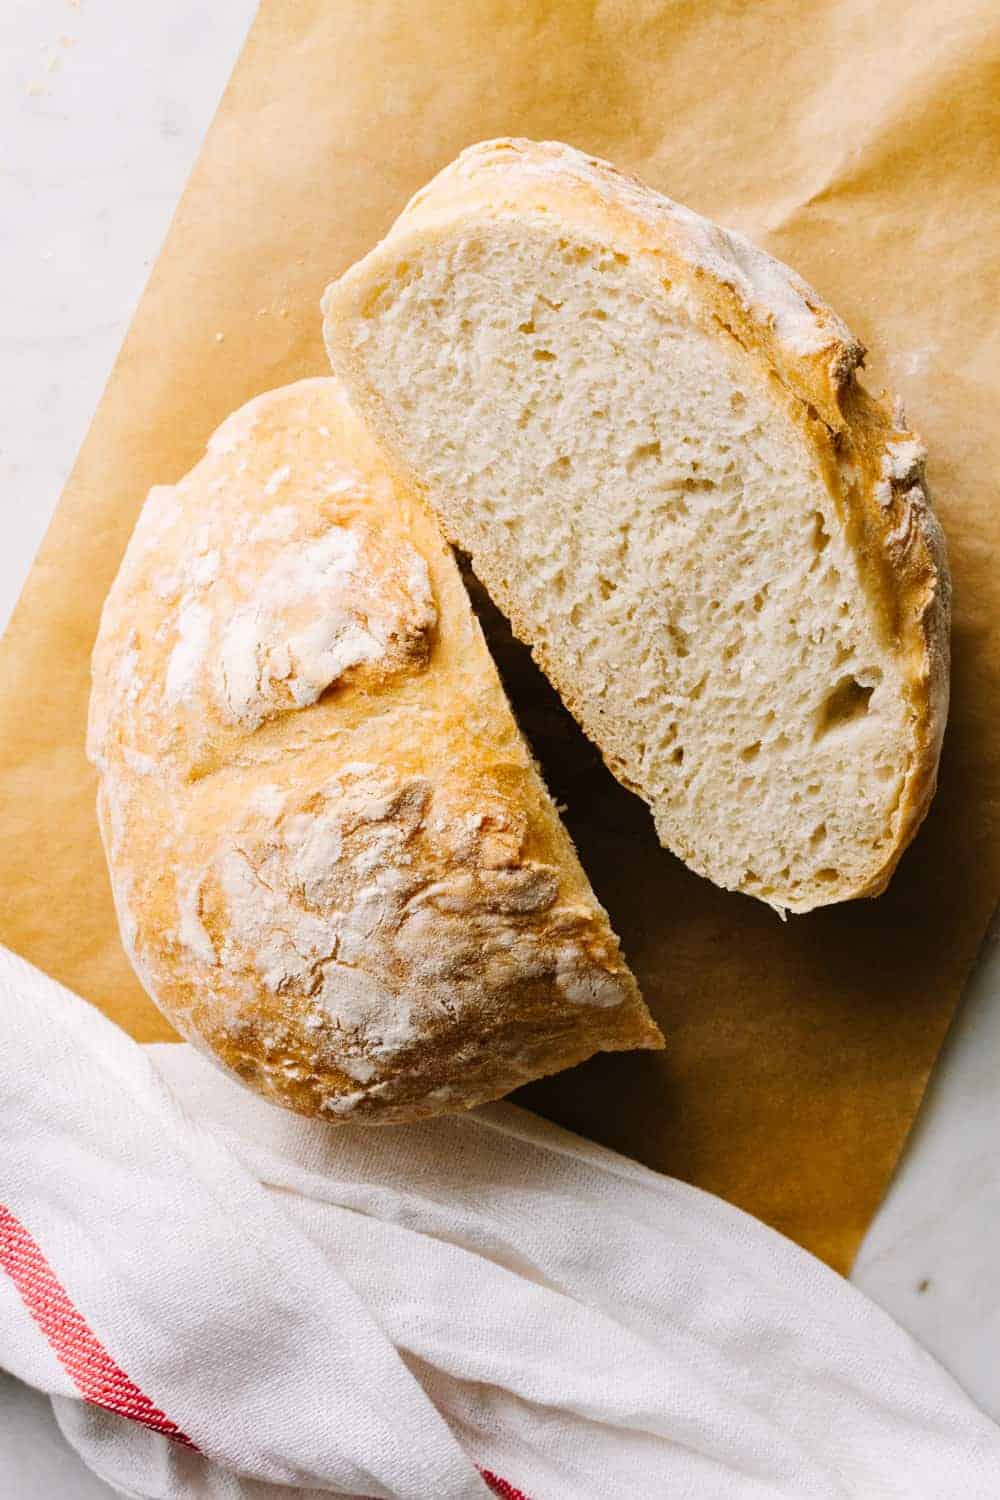
And that’s it, my bread-loving friends – fresh homemade bread with minimal ingredients and no kneading involved!
With a crispy crust and tender center, it’s absolutely delicious, and I know you’re going to love it too.
How To Make Pizza Dough
Follow the steps to make the dough. If making the larger master recipe, use 1/4 of the dough and shape it into a square or round pizza. Par-bake the dough for 7 – 10 minutes at 450 degrees F, carefully remove it from the oven, top it with sauce and pizza topping, and bake for another 10 – 15 minutes.

Storage Tips
Counter: The best way to store artisan bread is to place cut sides together and wrap it in a dish towel, linen bread bag, or paper bag and keep it in a dry place for up to 2 days. We don’t recommend storing in plastic because it will soften the crust during storage. But if you prefer to use plastic, you can simply toast your slice before serving.
Refrigerator: Leftover dough from the master loaf can be stored in the bowl it was mixed in or wrapped in saran wrap and stored in the fridge for up to 14 days. Simply pull a portion off and follow the instruction for baking. We don’t recommend keeping baked bread in the refrigerator as it will become stale faster.
Freezer: For longer storage, freezing baked artisan bread is the way to go, and can be stored in the freezer for up to 1 – 2 months. To freeze, let cool completely and wrap in a freezer bag, removing any excess air. Let thaw on the counter.
Reheating: Reheat slices or whole loaves in a preheated oven set to 350 degrees for 10 – 15 minutes. Alternatively, reheat slices in the toaster oven.
Serving Suggestions
Here are a few ways to use up your fresh-baked loaf of artisan bread:
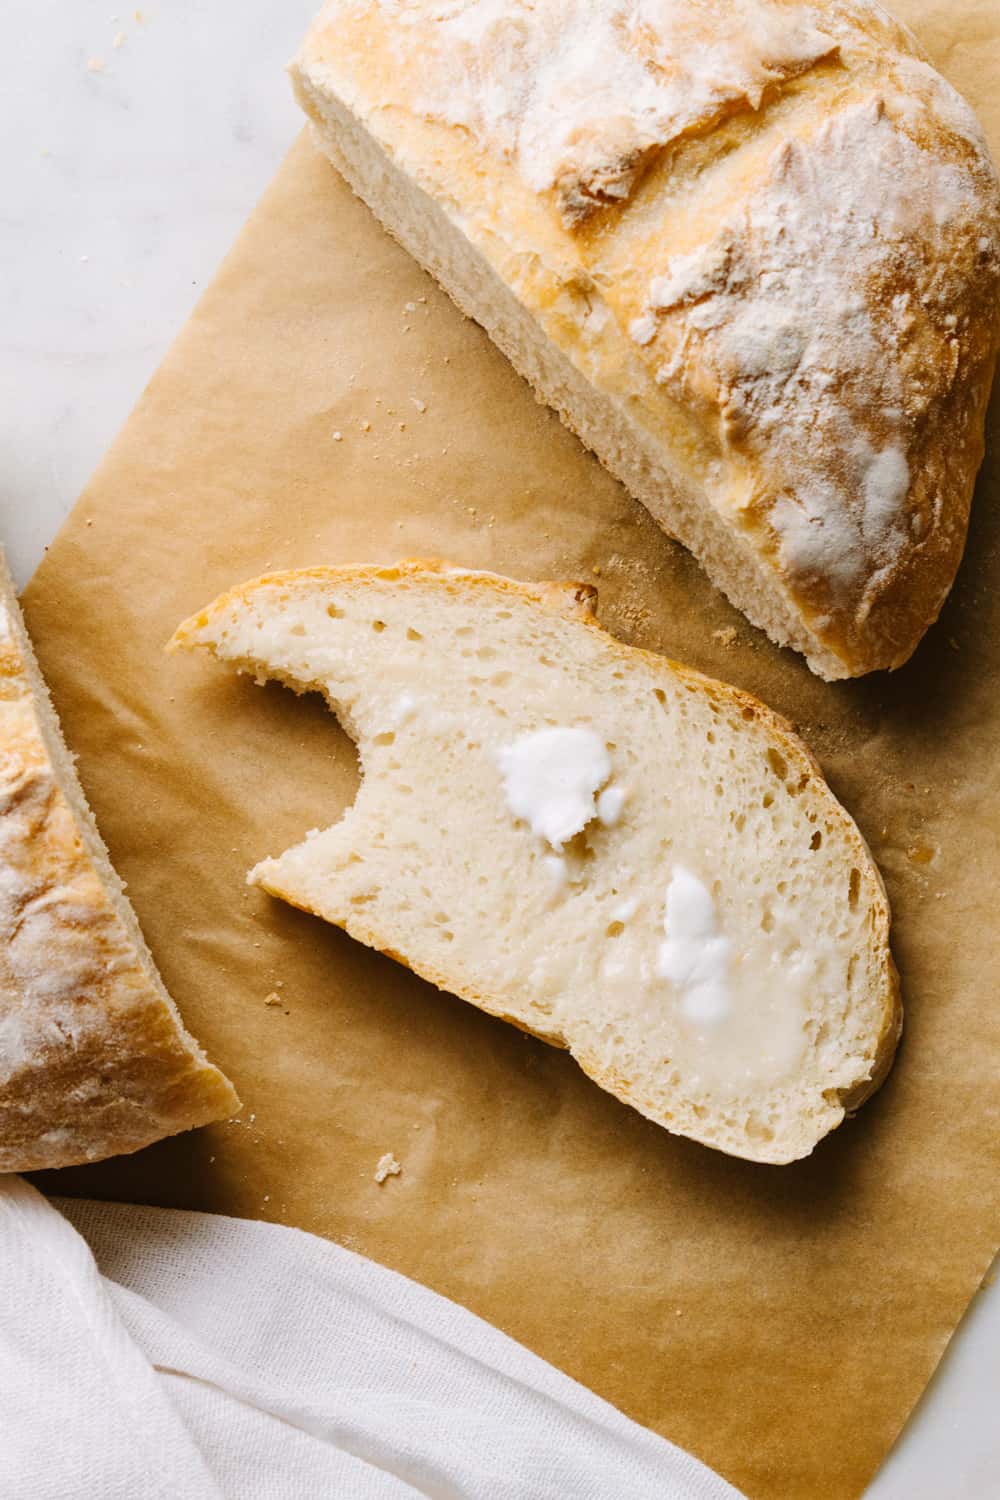
- Spreads: Slice it up and slather it with non-dairy butter and Berry Chia Jam. For sandwiches, use this Vegan Mayo or Aioli.
- Soup: Pair it with this Lemon Chickpea Orzo Soup or Potato Leek Soup to soak up the juices.
- Sandwich: It’s also fantastic for sandwiches, like this Spicy Carrot & Hummus Sandwich in which I toasted the bread and it was absolutely delicious.
- Salad: Serve with Vegan Caesar Salad or Green Salad with Chickpeas.
- Dipping: And let’s not forget dipping your freshly made bread in a little olive oil and balsamic vinegar – such a delicious snack or appetizer!
- Pizza crust: Use as a base for this Mediterranean Pizza or Pineapple-Veggie Lovers Pizza.
More Easy Bread Recipes!
- You may also like this No Knead Dutch Oven Bread. It’s full of flavor from the longer rise!
- Vegan Cornbread
- Vegan Naan
- Socca
- See all Bread recipes on TSV. You may find a new favorite.
If you try this easy vegan yeast bread recipe, please let me know! Leave a comment and rate it below. I love to hear what you think, or any changes you make.
ARTISAN BREAD RECIPE

Crispy crust on the outside, soft and tender on the inside, this artisan bread recipe with only 4 ingredients and no kneading required is SO easy to make and tastes amazing! Works great as pizza dough too. Recipe inspired by the book Artisan Bread in Five Minutes a Day
- Prep Time: 2 hours 30 min
- Cook Time: 30 min
- Total Time: 3 hours
- Yield: Makes 4 loaves 1x
- Category: Bread
- Method: bake
- Cuisine: American
- Diet: Vegan
Ingredients
Master Recipe (makes 4 small loaves):
- 3 cups lukewarm water
- 1 1/2 tablespoons instant or active dry yeast
- 1 1/2 tablespoons coarse salt
- 6 1/2 cups all-purpose flour
I used this halved recipe (makes 2 small loaves):
- 1 1/2 cups lukewarm water
- 1 packet instant or active dry yeast (about 2 1/4 teaspoons)
- 2 teaspoons himalayan salt
- 3 1/4 cups all-purpose flour
Instructions
MAKE THE DOUGH:
Mix: In a very large mixing bowl, combine the water, yeast, and salt. If adding herbs, now is a good time, use a teaspoon or so of your favorite herbs or double if using fresh. Add flour all at once and stir with a wooden spoon or mix with your fingers. Takes only a minute, if that. No need to knead, just mix. You just want everything combined with no streaks of flour left and you’re done.
Rise: Cover container with saran wrap (recommended) or a clean kitchen towel. Let the dough rise in a warm area with no draft. It may take anywhere from 2 to 4 hours, depending on the temperature (ideal temp is 75 – 85).
Separate: Once done, if making the master recipe, pull away 1/4 of the dough and refrigerate the rest to bake later. If making the halved recipe, pull away half of the dough. Store the unused dough covered tightly with plastic wrap or in a bowl covered tightly covered and keep in the refrigerator for up to 2 weeks. The longer it stores will enhance the flavor.
Shape: Lightly dust your hands and flat surface with flour or cornmeal, so it won’t stick. Take your dough and place it on the floured flat surface. Gently pull the sides of the dough toward the bottom, rotating the dough until you get a roundish shape with a smooth surface. Also, don’t worry if the bottom is a little bunched, it will flatten out upon the second rising.
Rest: Place your dough ball (boule) onto a flat surface lined with parchment paper (if not using parchment paper, place on a flat surface dusted with cornmeal or flour), and let it rest for at least 30 minutes. No need to cover it. If the dough has been refrigerated, it helps to let it rest a little more until it’s no longer chilled.
BAKE THE DOUGH:
Preheat the oven to 450 degrees F. Placing a cast iron skillet, pizza stone, roasting pan, or shallow fry pan in the oven to get it nice and hot (a baking sheet will be fine too). Let the oven preheat for 30 minutes.
Prep oven and dough: When ready to bake, place a rimmed cookie sheet or small pot with at least 1 cup of water on the bottom rack to steam – this will help the crust get nice and crispy, but it’s fine if you skip it. Line your baking vessel with parchment paper or lightly flour with cornmeal. Dust a little flour on top of your loaf, using a knife slash the top, about 1/4 inch deep, in a cross, tick tac toe, or scallop pattern (this helps the bread expand when baking while also giving it a rustic look).
Bake: Place prepped dough in center of baking vessel and place in the oven, center rack, for 30 – 40 minutes, until you get a nice brown crust. Carefully remove from oven, let cool a few minutes and enjoy!
Notes
To make pizza dough: Follow the steps to make the dough, if making the larger master recipe, use 1/4 of the dough and shape into a square or round pizza. Par-bake the dough for 7 – 10 minutes at 450 degrees F, carefully remove from oven, top with sauce and pizza topping and bake for another 10 – 15 minutes.
Gluten-free: Use a 1-to-1 gluten free flour blend containing xanthan gum. If it doesn’t contain xanthan gum, add 1 1/2 teaspoons to the master loaf recipe. No other changes are needed. Bread will form a hard crust and the center will be nice, but it will taste different and may not rise as much.
Using Grams: For those baking using weight instead of cups, here is a handy guide King Arthur’s Ingredient Weight Chart. Simply use the search filter to find the flour you are using.
Make larger loaves of bread. When using the master recipe, you can use 1/2 of the recipe to make a single larger loaf.
FOLLOW TSV on Facebook, Instagram, Pinterest, Youtube, Subscribe (email), or RSS for more recipes and inspiration!
I made this bread last week with my 2 year old and it was a big hit! We loved the taste, it’s simple ingredients, and the fact that we could make it in a short amount of time. This is now our go to bread recipe.
Hi Ashely, baking with kids is so fun! So glad you all loved it, and thanks for the feedback! Cheers :)
I made this yesterday and was amazed. I am living in an area with out organic breads and now I can make bread myself. It turned out a little dense though, is this because I didn’t let it rise enough on the second rise. or is this just how it is? I also didn’t read the directions too good, added 1/4 cup too much flower. I love breads with seeds on the top. How would I add them to this recipe? Thank you.
So glad you enjoyed the recipe! It could be a little dense depending on the flour you used, or that you added a tad too much. I’ve made this using whole wheat and my loaf was a little more like sandwich bread. To add a layer of seeds, just before going into the oven to bake add a sprinkle of seeds over top! Thanks for the feedback, and let me know how your next loaf goes! Cheers :)
Can this be made in a bread maker?
Yes, you can make this bread in a bread machine. You may consider using bread machine yeast or rapid rise yeast instead of active yeast. Just follow instructions for your bread machine for this type of bread and see what they recommend.
Would love know how it goes! Best of luck and enjoy this delicious bread! :)
Can I bake this in a pie pan? I’m overseas and there isn’t much bakeware here. My options are a shallow, rectangular glass pan, a pie pan, or a deep bread pan. Thank you!
You sure can bake it in a pie pan or skillet! There are some videos you can check out on Youtube for further assistance if needed. Enjoy!
Just made this for the first time and it was fantastic! My husband can’t stop raving about the crust. Shared the recipe today on my blog.
Great recipe! I added thyme and zest from a meyers lemon, and presto! The hands-down best bread I’ve ever baked to date. ;) Admittedly, I did add 1/8 c of sugar but can see myself not using it the next round.
That sounds wonderful! Glad the recipe worked well for you. Cheers :)
Does the wholewheat four have to be bread (strong) flour or will any flour like plain or self raising be ok?
You can use regular whole wheat flour, it doesn't have to be bread flour. Bread flour has more gluten and will result in a slightly better texture and more volume. But most flours will work fine, ie…all purpose, whole wheat, spelt, whole wheat bread flour are the ones I have used. As for self rising flour, that is flour that contains salt and leavening (baking powder/soda) and is best to use for bread recipes that do not call for yeast, but you can sub it in and omit 1/2 of the salt listed. Honestly, I would stick with the flours mentioned above for the best results. Best of luck with your loaf! :)
How long can you keep the dough in the fridge? I love the idea of being able to bake a fresh bread roll while cooking a meal!
Bread dough will keep in the fridge for up to a week. I love this idea too. Just use the 'original recipe' listed above so you'll have enough to cut off a piece for whenever you want it. Perfect fresh loaf every time!
Can you please advise on how I would adjust the recipie if I only have instant dry yeast? I can't seem to find any other yeast around
Actually, instant and active dry yeast can be used interchangably. The only difference is that active dry yeast needs to be dissolved in water where as instant yeast does not. You can read a bit more in this article from The Kitchn: http://www.thekitchn.com/active-dry-instant-yeast-best-tips-for-working-with-yeast-180312
I apologize for the late response, I missed this comment. Best of luck and enjoy your bread!
Oh my! This looks fantastic…a perfect bread!!
Yes, it's really wonderful!